
If you work with files on your local computer and need to upload or download them to your Web60 site, scp and rsync are two powerful command-line tools that let you transfer files securely. They run from your own computer (not from the Web60 terminal) and connect to your site using your SFTP credentials.
Your Web60 dashboard provides ready-made commands for both tools that you can copy and use straight away.
Before you start
To use scp or rsync you will need:
- A verified Web60 account with SFTP enabled
- Your SFTP credentials from your Web60 dashboard (go to your site, then click SFTP in the left-hand menu)
- A terminal application on your own computer (Terminal on Mac/Linux, PowerShell or Git Bash on Windows)
Finding your connection details
- Go to your Web60 dashboard.
- Click your site name.
- Click SFTP in the left-hand menu.
- Your connection details are shown at the top of the page: host, port, and username.
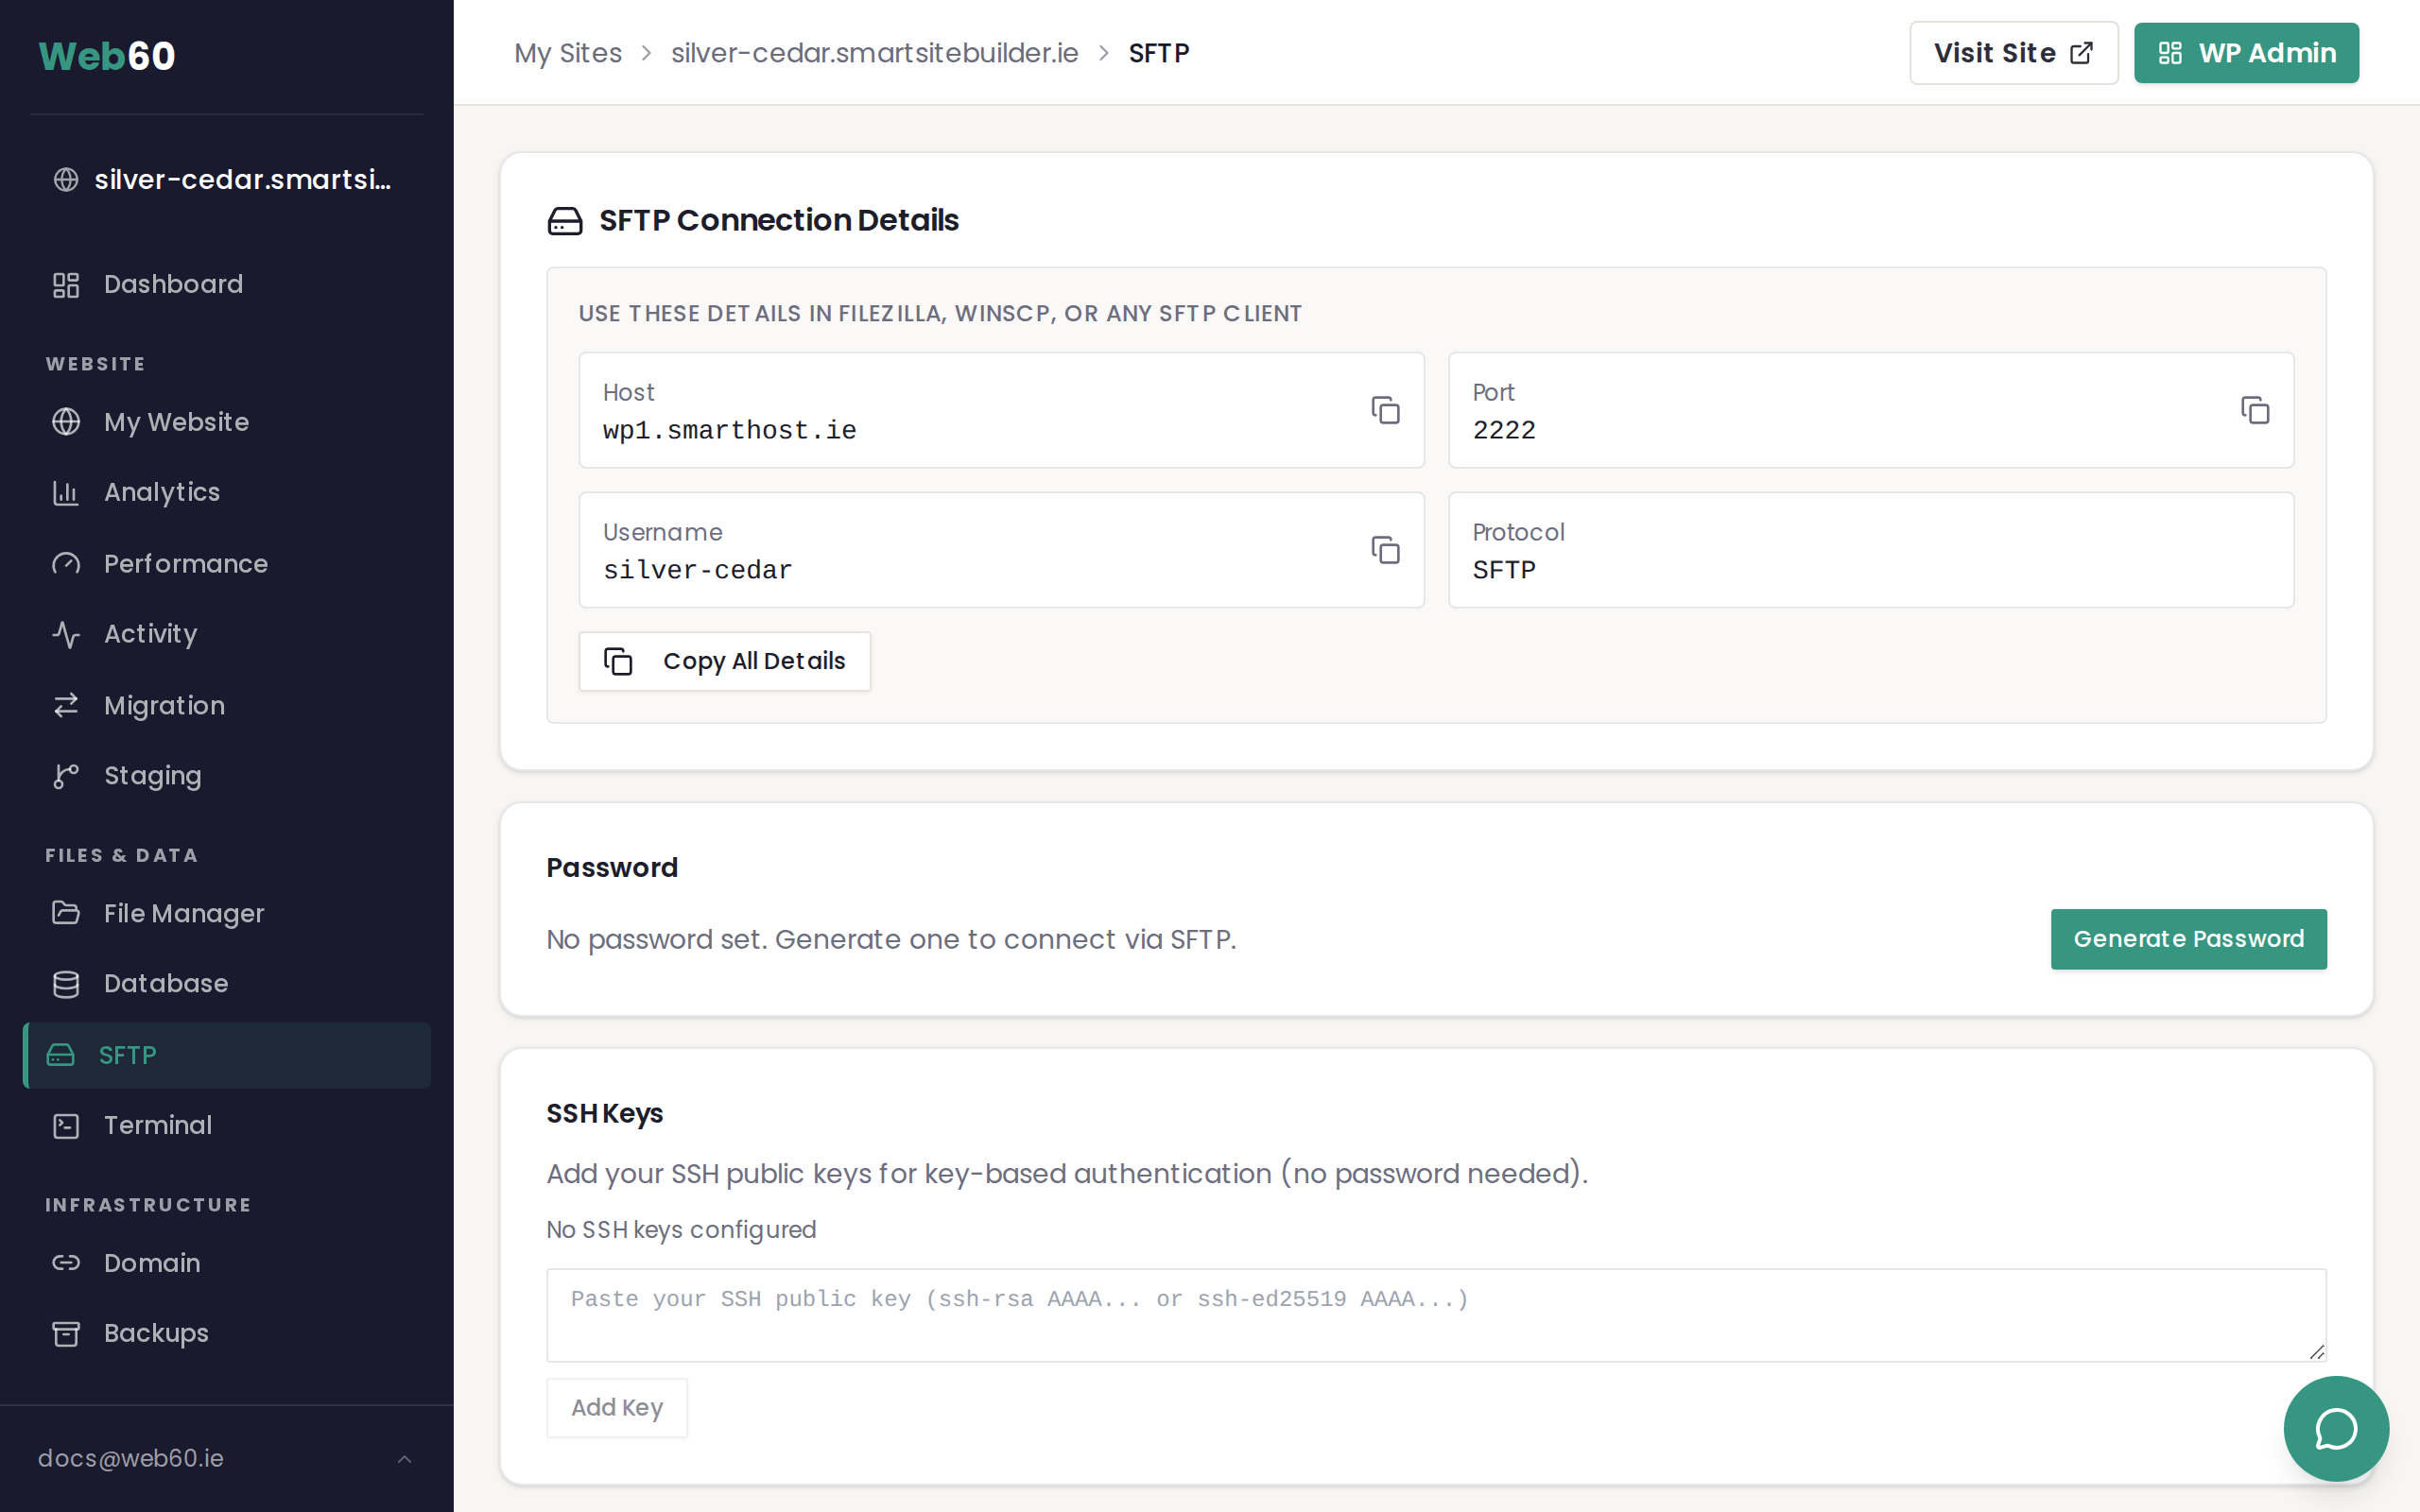
If you have not set a password yet, click Generate Password. Save the password immediately because it is only shown once. Alternatively, add an SSH public key for password-free authentication.
Using rsync
rsync is the recommended tool for transferring files. It compares your local files with the remote files and only sends what has changed, which makes it much faster than copying everything each time. It is ideal for deploying theme or plugin changes, syncing backups, or keeping a local copy of your site up to date.
Your dashboard shows ready-made rsync commands under the Command Line Access section of the SFTP page.
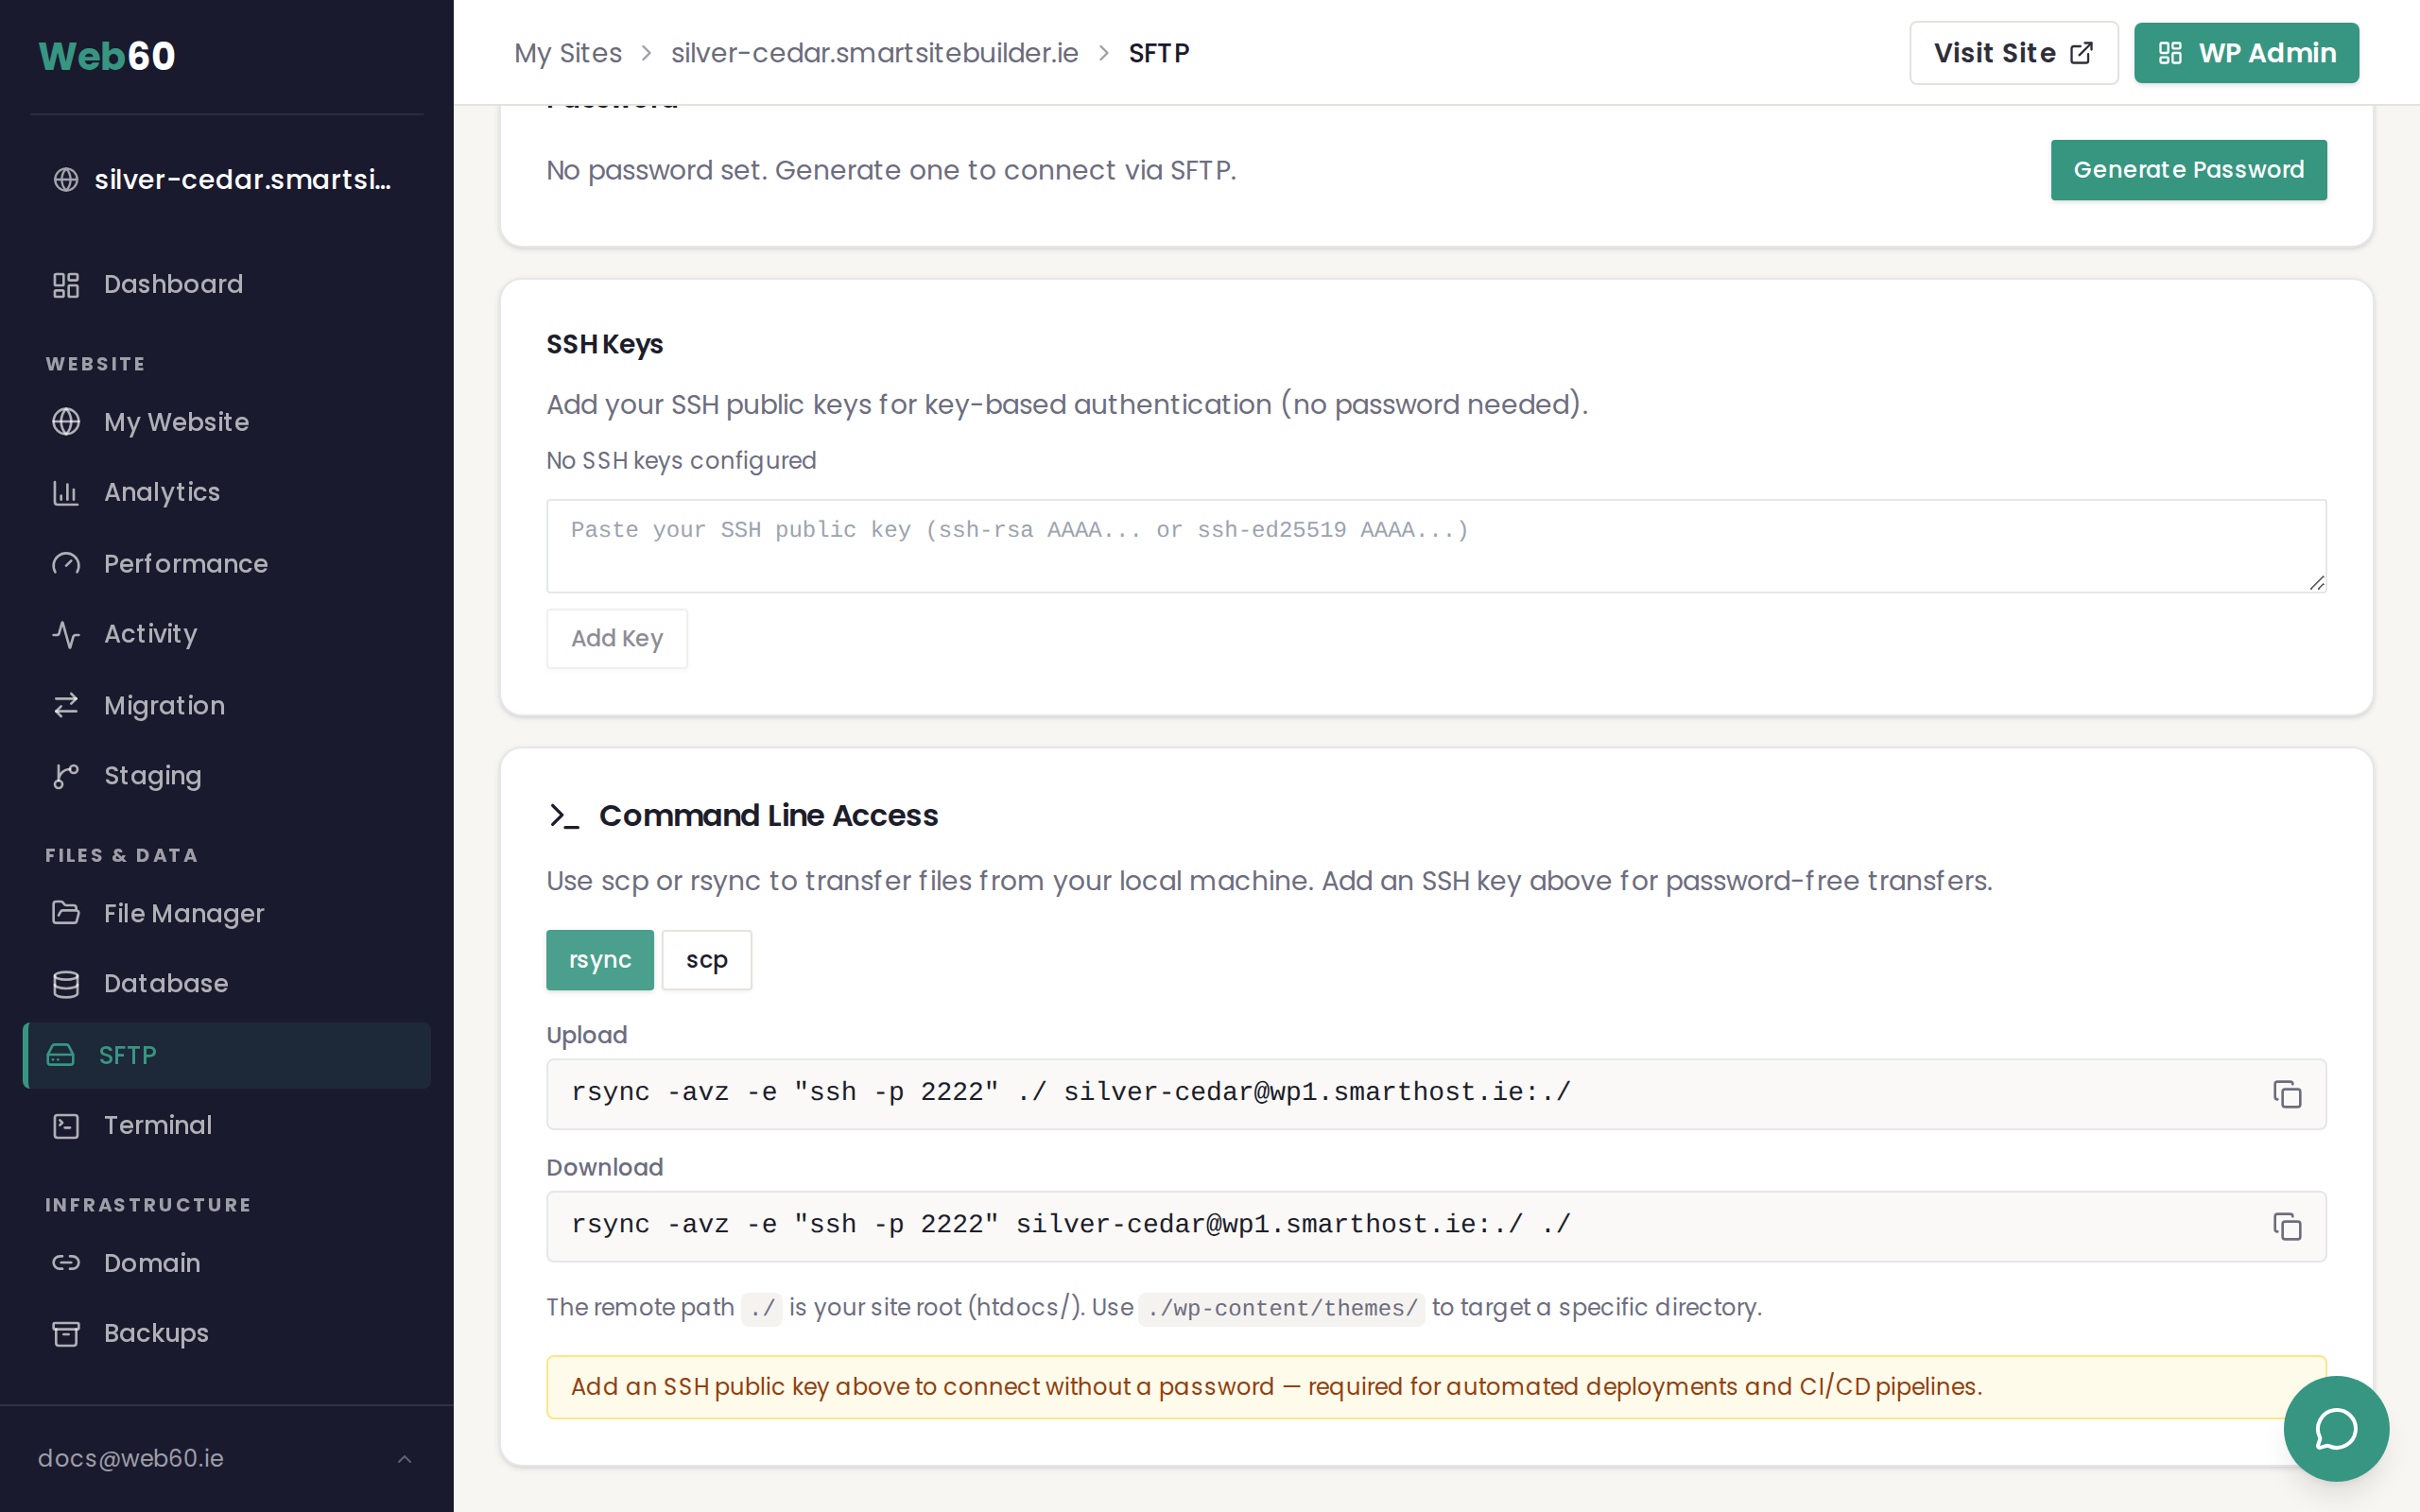
Upload files to your site
Open a terminal on your computer and navigate to the folder containing the files you want to upload. Then run:
rsync -avz -e "ssh -p 2222" ./ yoursite@wp1.smarthost.ie:./
Replace yoursite with your site name (shown as your SFTP username). This uploads all files in the current directory to your site's root folder.
Download files from your site
To download your site files to your current local directory:
rsync -avz -e "ssh -p 2222" yoursite@wp1.smarthost.ie:./ ./
Target a specific directory
The remote path ./ is your site root. To target a specific folder, change the remote path:
rsync -avz -e "ssh -p 2222" ./my-theme/ yoursite@wp1.smarthost.ie:./wp-content/themes/my-theme/
Useful rsync flags
| Flag | What it does |
|---|---|
-a | Archive mode: preserves permissions, timestamps, and directory structure |
-v | Verbose output, showing each file as it transfers |
-z | Compress data during transfer (faster over slow connections) |
--dry-run | Shows what would be transferred without actually doing it |
--delete | Removes files on the remote that do not exist locally (use with care) |
--exclude='*.log' | Skips files matching a pattern |
Preview before transferring
Always run with --dry-run first if you are unsure what will be affected:
rsync -avz --dry-run -e "ssh -p 2222" ./ yoursite@wp1.smarthost.ie:./
Using scp
scp is simpler than rsync and works well for copying individual files or small batches. It copies files in full every time, so it is best suited for one-off transfers rather than ongoing synchronisation.
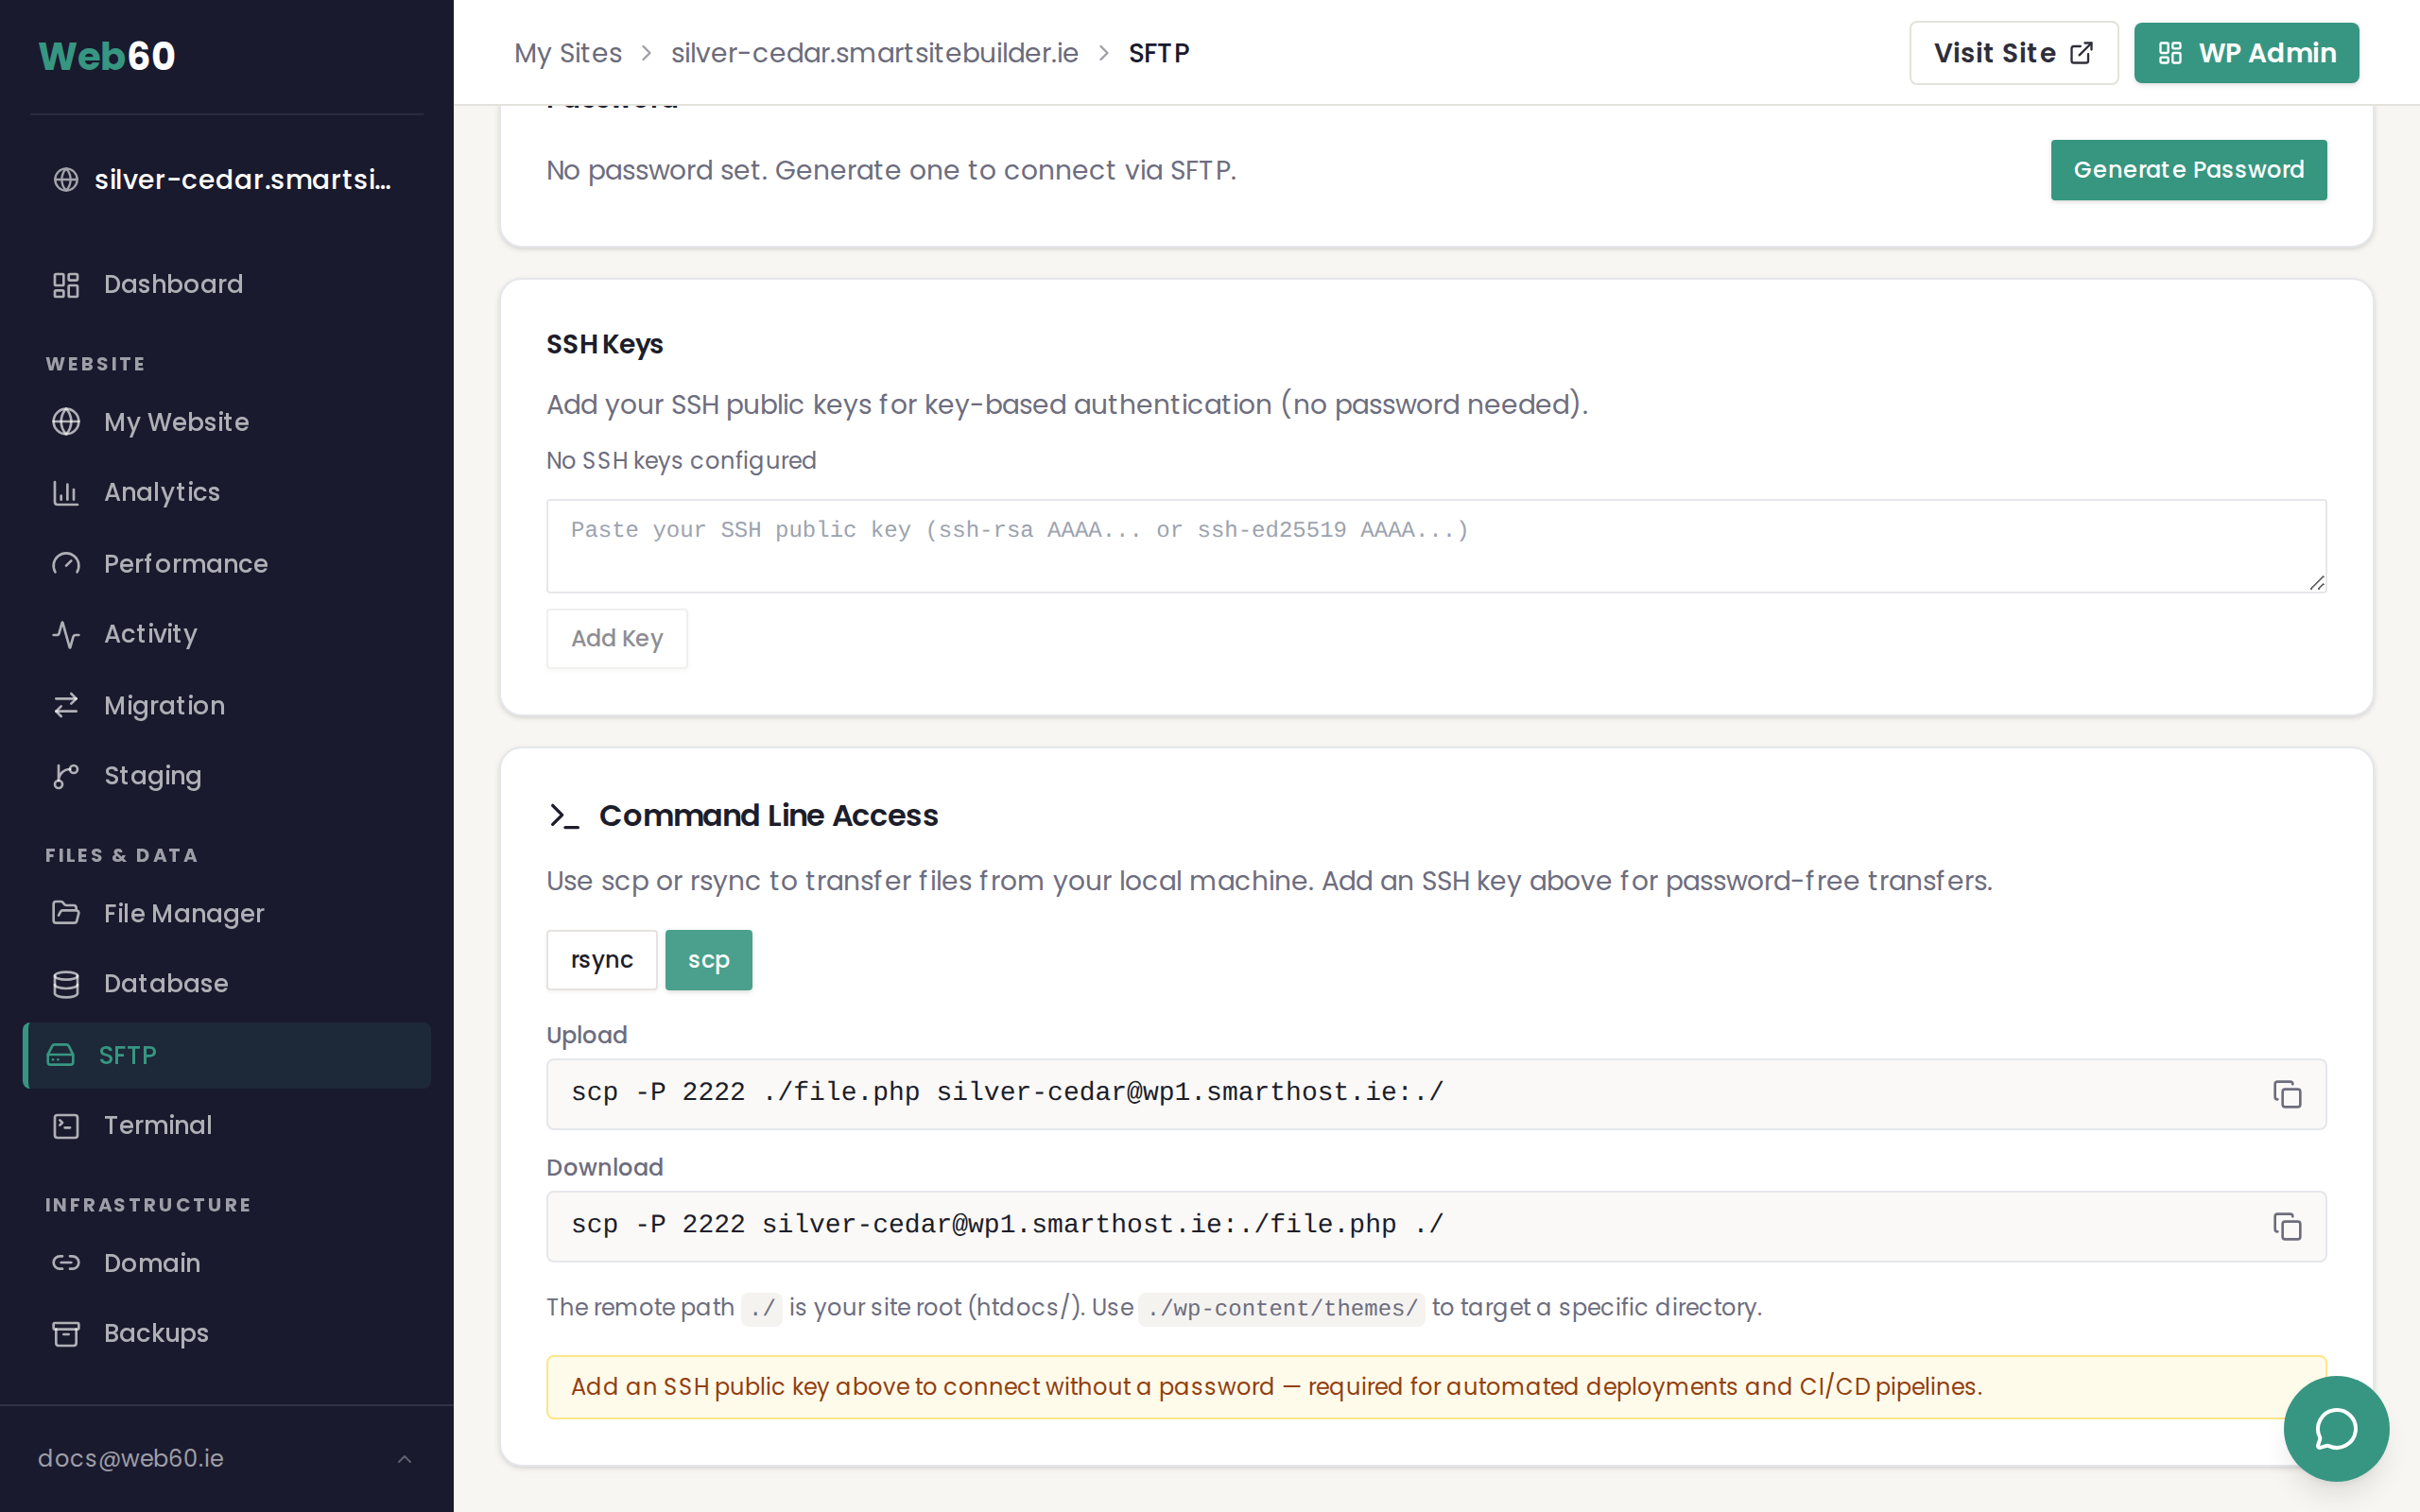
Upload a file
scp -P 2222 ./file.php yoursite@wp1.smarthost.ie:./
Download a file
scp -P 2222 yoursite@wp1.smarthost.ie:./file.php ./
Upload an entire folder
Add the -r flag to copy a directory recursively:
scp -r -P 2222 ./my-plugin/ yoursite@wp1.smarthost.ie:./wp-content/plugins/my-plugin/
When to use which tool
| Scenario | Best tool |
|---|---|
| Deploying a theme or plugin you are developing | rsync, because only changed files are transferred |
| Downloading a single file to check locally | scp, which is quick and simple |
| Keeping a local backup copy of your site | rsync, which is incremental and fast on repeat runs |
| Uploading a one-off ZIP or SQL file | scp, which is straightforward for single files |
| Automated deployments or CI/CD pipelines | rsync with SSH keys, requiring no password prompt |
Setting up SSH keys for password-free transfers
If you transfer files regularly, adding an SSH key avoids typing your password each time. This is also required for automated scripts and CI/CD pipelines.
- Generate a key pair on your computer if you do not already have one:
ssh-keygen -t ed25519
-
Copy the contents of your public key (usually
~/.ssh/id_ed25519.pub). -
Go to the SFTP page in your Web60 dashboard and paste it into the SSH Keys section.
-
Click Save. You can now connect without a password.
Important notes
- The port is 2222, not the default 22. Always include
-P 2222(scp) or-e "ssh -p 2222"(rsync). - Transfers are scoped to your site's root directory. You cannot access other sites or system files.
- The file
wp-config.phpis protected and cannot be downloaded or overwritten via SFTP. - Always take a backup from your Web60 dashboard before uploading files that overwrite existing content.
Need help?
If you have questions about file transfers, visit our support page or email hello@smarthost.ie.
Frequently asked questions
What is the difference between scp and rsync?
scp copies individual files or folders in full every time. rsync compares files and only transfers what has changed, making it much faster for repeated transfers or large directories.
Can I use scp and rsync from the Web60 terminal?
No. These commands run from your own computer, not from the Web60 terminal. They connect to your site over a secure connection using your SFTP credentials.
Do I need to set up SSH keys?
Not for basic use. You can authenticate with a password. But SSH keys are recommended for regular use and required for automated deployments or CI/CD pipelines.
Why is the port 2222 instead of the usual 22?
Web60 runs its file transfer service on port 2222 for security. Always include the port flag (-P for scp, -p for rsync) in your commands.
Last updated: 25 March 2026