
The Web60 Migration Plugin is the easiest way to move your existing WordPress website to Web60. It handles the entire process automatically, copying your pages, posts, images, plugins, themes, and database in one go. This guide walks you through every step.
Before you start
Make sure you have:
- A Web60 account with an active website set up in your Web60 dashboard
- Admin access to your current WordPress website (you need to be able to install plugins)
Your existing website stays online throughout the process. Nothing changes for your visitors until you approve the migration.
Step 1: Open the Migration tab in your Web60 dashboard
- Log in to your Web60 dashboard.
- Select the website you want to migrate into.
- Click Migration in the left-hand sidebar.
You will see instructions and a Download Plugin button.
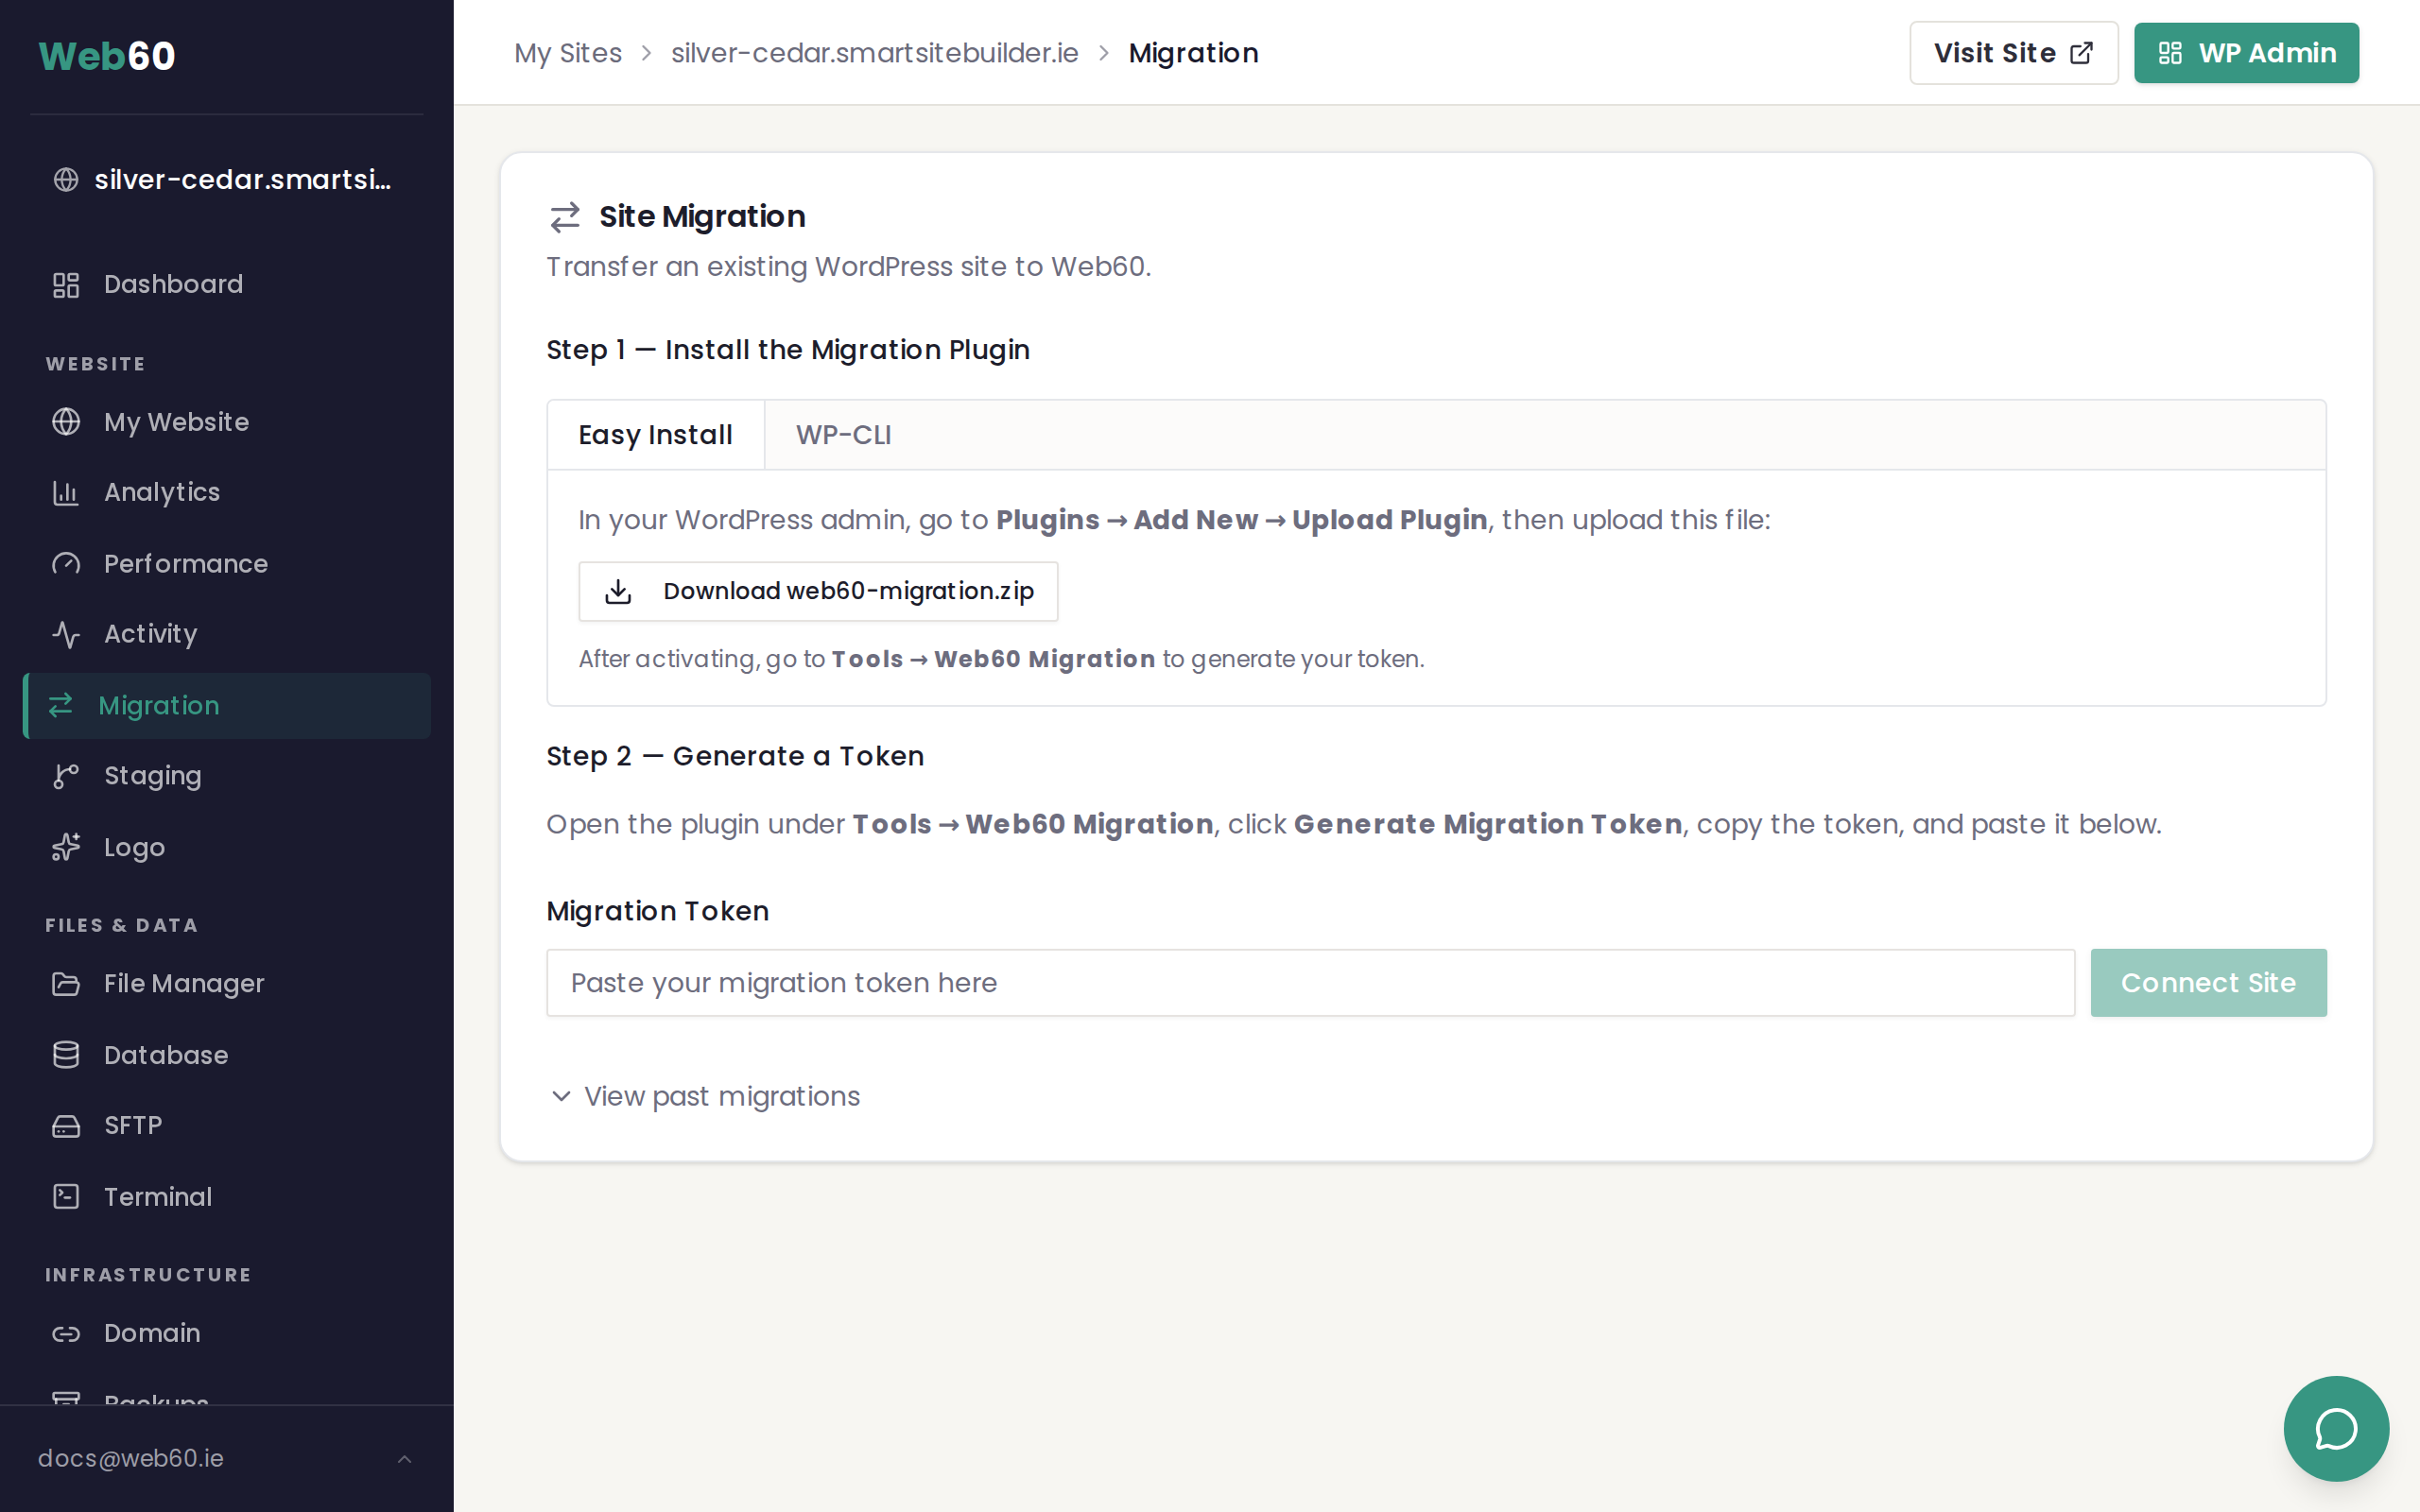
Step 2: Download the migration plugin
- Click the Download Plugin button to save the plugin file to your computer.
- Keep this page open — you will need to come back to it shortly.
Step 3: Install the plugin on your current WordPress site
- Log in to the WordPress admin area of your current website (the one you are moving from).
- Go to Plugins in the sidebar, then click Add New.
- Click Upload Plugin at the top of the page.
- Choose the plugin file you downloaded in Step 2 and click Install Now.
- Once installed, click Activate.
The plugin is lightweight and will not affect your current website's performance.
Step 4: Copy the pairing token
After activating the plugin, it will display a pairing token — a short code that securely links your current site to your new Web60 site.
- Copy the pairing token shown on your current WordPress site.
- Go back to the Migration page in your Web60 dashboard.
- Paste the token into the Pairing Token field.
- Click Confirm to start the migration.
Step 5: Watch the progress
Once confirmed, the migration begins automatically. You will see real-time progress on the Migration page, including:
- Database transfer — your posts, pages, comments, settings, users, and all other database content
- File transfer — your images, themes, plugins, and everything in your uploads folder
You can leave the page and come back at any time. The migration continues in the background even if you close your browser.
Step 6: Review on the staging address
When the migration finishes, your website will be available on a temporary staging address. This lets you check everything before going live.
- Click the staging link on the Migration page to preview your migrated site.
- Browse through your pages and check that images, menus, and content all look correct.
- Test any forms or interactive features.
Take your time — your old website is still live and your visitors are not affected.
Step 7: Approve the migration
When you are satisfied that everything looks right:
- Click the Approve button on the Migration page.
- Your Web60 site will now serve the migrated content.
If anything does not look right after approving, you can use the Rollback button to go back to the previous state.
Step 8: Update your domain
The final step is pointing your domain name to Web60. See our guide on connecting your domain for detailed instructions.
Troubleshooting
The plugin will not install
Some hosting providers restrict plugin uploads through WordPress. If you see an error when trying to install the plugin:
- Try uploading the plugin file directly using your current host's file manager or file transfer tool. Upload the zip file to the
/wp-content/plugins/folder and unzip it there. - If your host does not allow any plugin installations, use the manual migration method instead.
The connection fails or times out
If the migration does not start after entering the pairing token:
- Check that your current host is not blocking outgoing connections. Some budget hosts have strict firewall rules.
- Make sure the plugin is still activated on your current site.
- Try generating a new pairing token and entering it again.
The migration seems stuck
Large websites can take a while to transfer. If the progress bar has not moved for more than 15 minutes, try refreshing the page. If it still appears stuck, cancel the migration and try again. For very large sites, see our guide on migrating large WordPress sites.
Need help?
If you run into any issues during your migration, visit our support page and we will help you get everything moved across smoothly.
Frequently asked questions
What if the plugin won't install on my current site?
Some hosts restrict plugin uploads. If you cannot install the plugin through WordPress, try uploading the plugin file using your current host's file manager or file transfer tool. If that does not work either, you can use the manual migration method or contact our support team for help.
Does the migration copy everything?
Yes. The plugin copies your entire website including all pages, posts, images, themes, plugins, database settings, and uploaded files. Nothing is left behind.
Can I cancel a migration that's in progress?
Yes. You can cancel the migration at any time before you approve it. Click the Cancel button on the Migration page in your Web60 dashboard. Your current website will not be affected.
Last updated: 31 March 2026