
Moving your WordPress website to Web60 is straightforward, and you have several options depending on how hands-on you want to be. Whichever method you choose, the result is the same: your full website — pages, posts, images, plugins, and settings — gets copied to Web60 ready for you to review and approve.
Your existing site stays online
One of the most important things to know is that your current website remains live throughout the entire migration. Nothing changes for your visitors until you are completely happy with the migrated version and choose to switch over.
Three ways to migrate
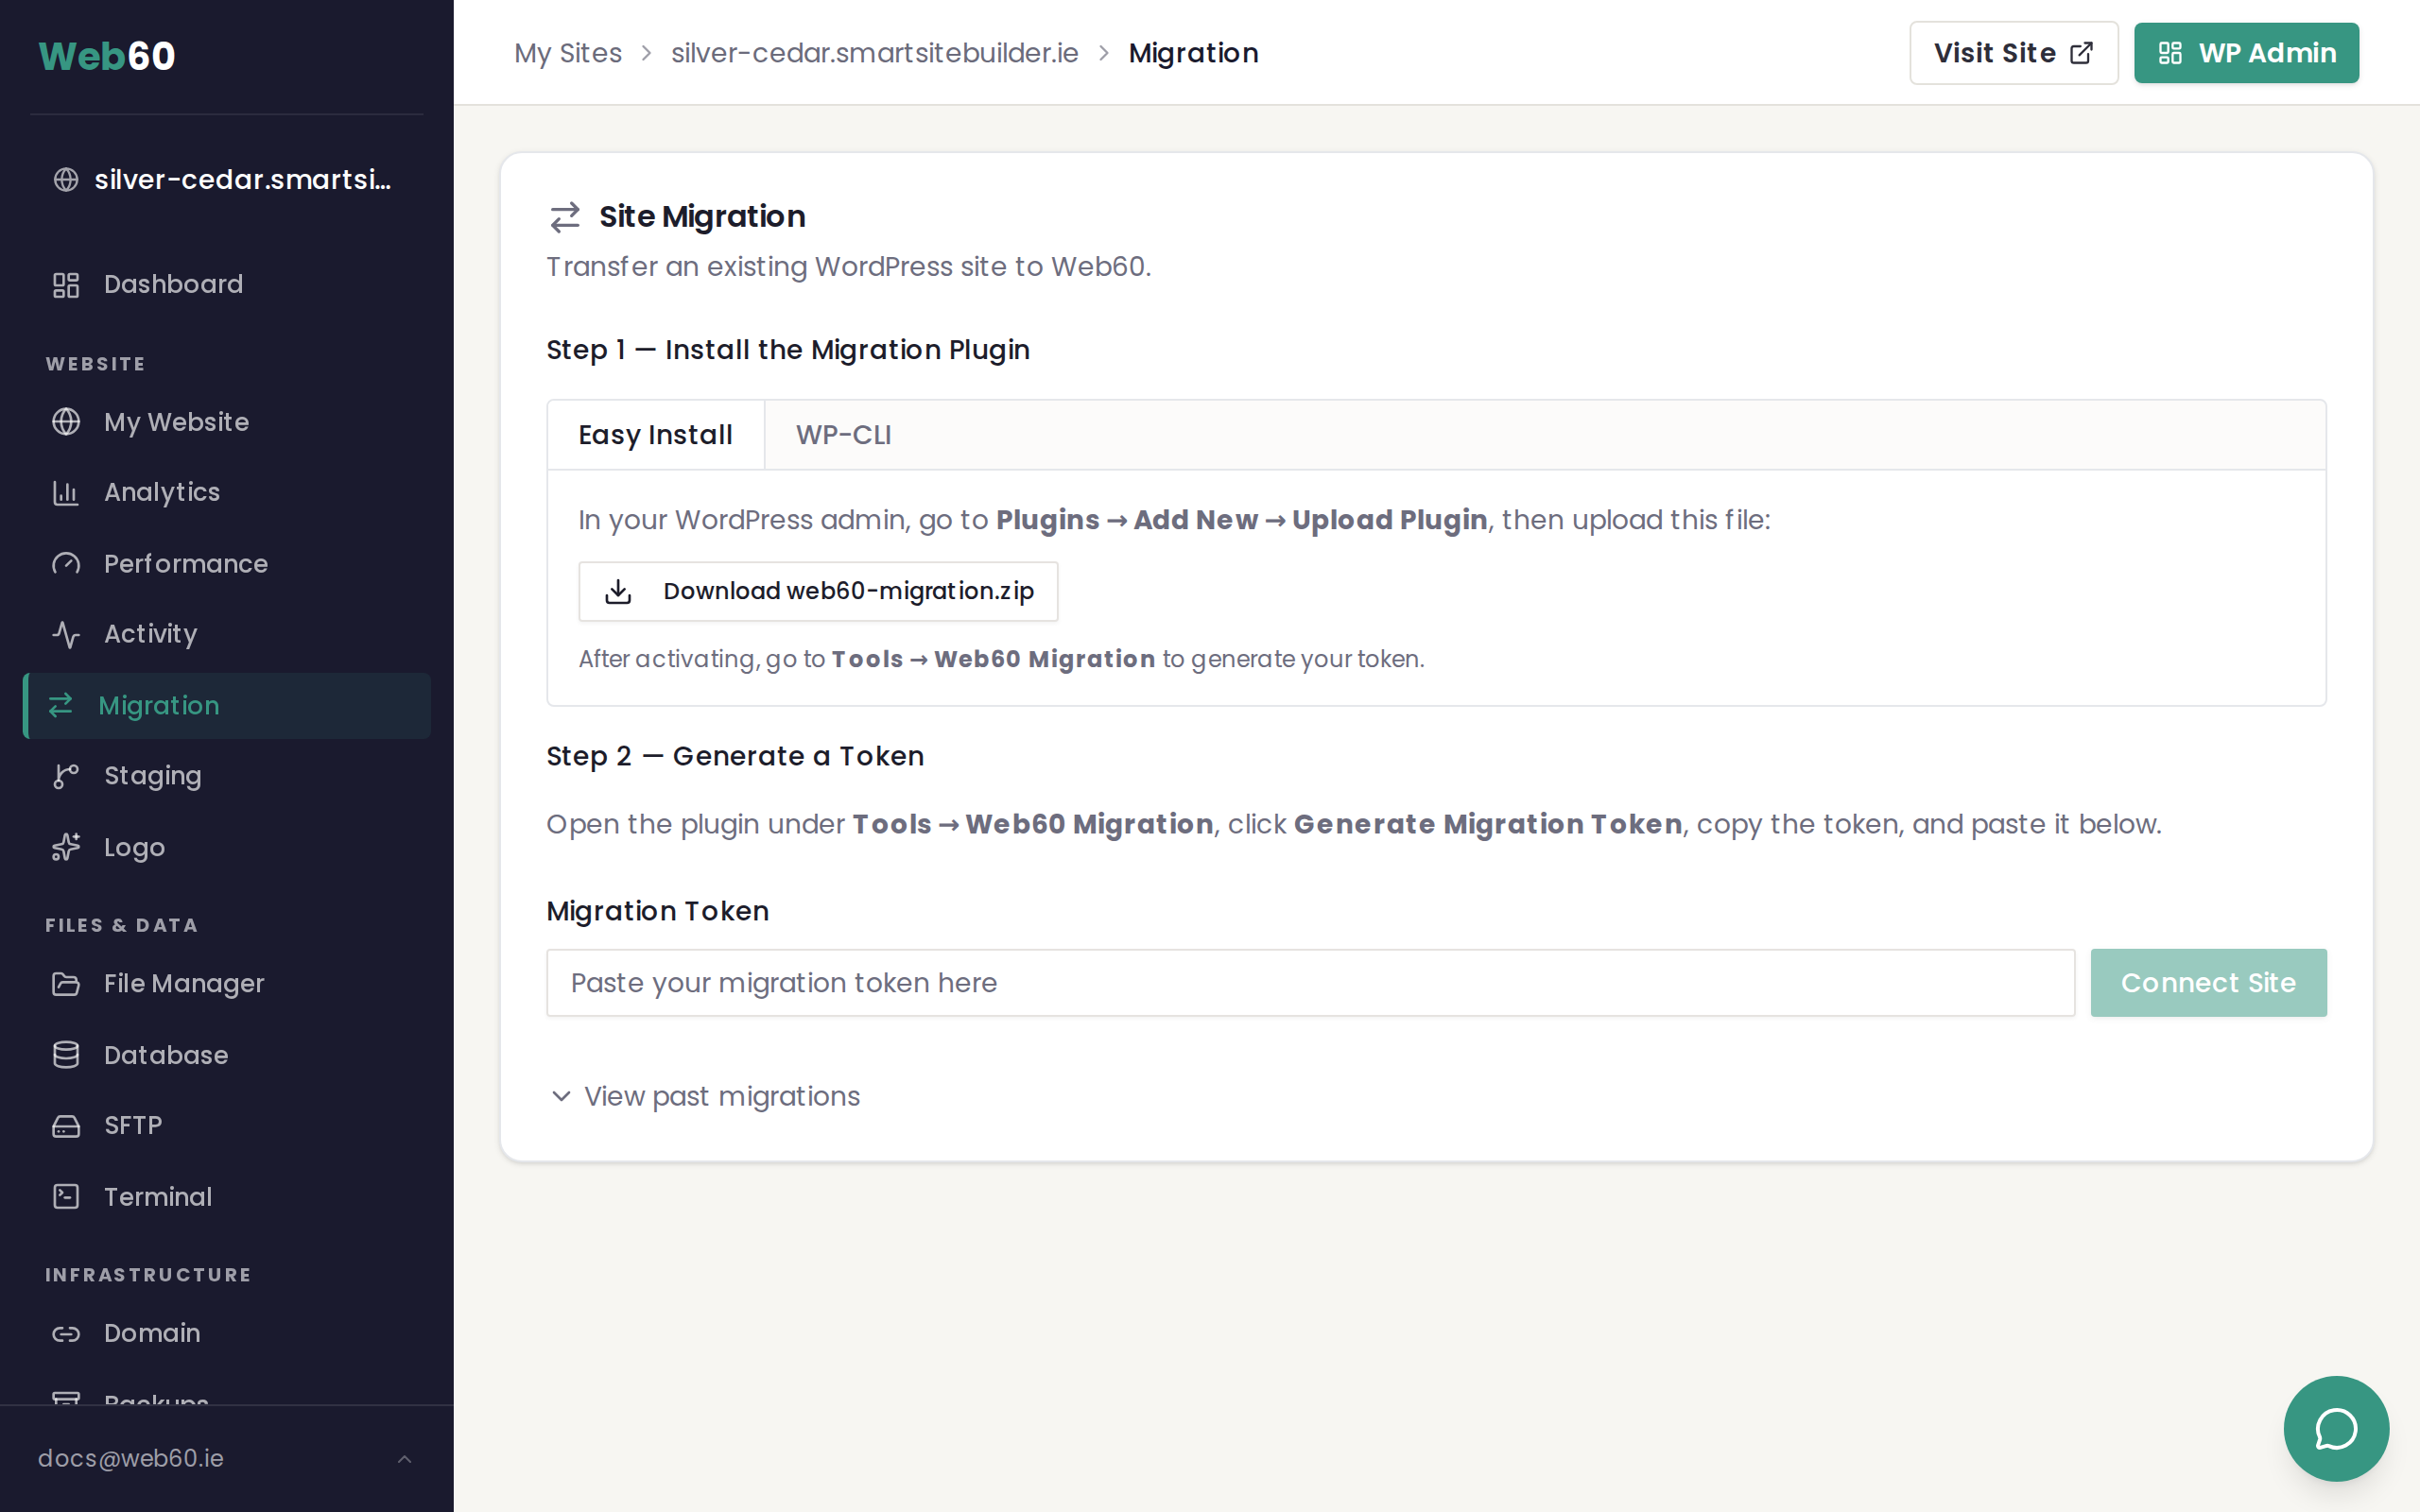
1. The Web60 Migration Plugin (recommended)
This is the easiest and fastest method. You install a small plugin on your current WordPress site, paste a pairing token from your Web60 dashboard, and the plugin copies everything across automatically.
Best for: Most websites. This is the method we recommend for the vast majority of migrations.
Read the full guide: Using the Web60 Migration Plugin to transfer your site.
2. Manual migration using file transfer and database tools
If you are comfortable working with file transfers and database exports, you can move your website manually. This involves downloading your files and database from your current host, then uploading them to your Web60 site.
Best for: Experienced users, or situations where the plugin method is not suitable (for example, if your current host restricts plugin installations).
Read the full guide: Migrating manually using file transfer and database export.
3. Free assisted migration by Web60 support
If you would rather not handle the migration yourself, our support team will do it for you. Just get in touch and we will take care of everything. This service is completely free for all Web60 customers.
Best for: Anyone who wants a hands-off experience, or websites that are particularly large or complex.
Contact our support team to request an assisted migration.
How migration works (the basics)
No matter which method you choose, every migration follows the same basic steps:
- Transfer your files and database — Your website content, images, themes, plugins, and database are copied from your current host to Web60.
- Review on a temporary address — Once the transfer is complete, your migrated site is available on a staging address so you can check everything looks right.
- Approve the migration — When you are happy, you approve the migration and your Web60 site starts serving the new content.
- Update your domain — The final step is pointing your domain name to Web60. See our guide on connecting your domain for instructions.
What gets migrated
All migration methods copy the following:
- All your pages, posts, and custom post types
- Your images and media files
- Your themes and plugins
- Your WordPress settings and configuration
- Your database (users, comments, menus, widgets, and everything else)
After migration
Once your migration is complete, we recommend running through our post-migration checklist to make sure everything is working perfectly before connecting your domain.
Need help?
If you have any questions about migrating your website, visit our support page and we will be happy to help.
Frequently asked questions
Will my website go offline during migration?
No. Your existing website stays fully online while the migration is happening. Visitors will not notice any change until you approve the migration and update your domain settings.
Can Web60 migrate my site for me?
Yes. If you would prefer not to handle the migration yourself, contact our support team and we will move your website across for you at no extra cost.
How long does a migration take?
Most migrations finish within a few minutes. Larger websites with lots of images or a big database may take a little longer, but rarely more than 30 minutes.
Last updated: 31 March 2026