
Before you can connect to your website files using SFTP software, you need to enable SFTP access and get your connection credentials from your Web60 dashboard. This guide walks you through the process.
Step-by-step instructions
1. Sign in to your Web60 dashboard
Go to your Web60 dashboard and sign in with your usual email and password.
2. Select your site
Click on the name of the site you want to enable SFTP access for.
3. Open the SFTP section
In the left sidebar, click SFTP. This is where you manage your SFTP access and credentials.
4. Verify your account
If this is your first time enabling SFTP, you will be asked to verify your account. This is a security requirement to make sure it is really you requesting file access. Follow the on-screen verification steps to complete this.
5. Wait for the activation period
After verification, there is a 24-hour activation period before SFTP access becomes available. This is a security measure to protect your website files. You will receive a notification when your SFTP access is ready to use.
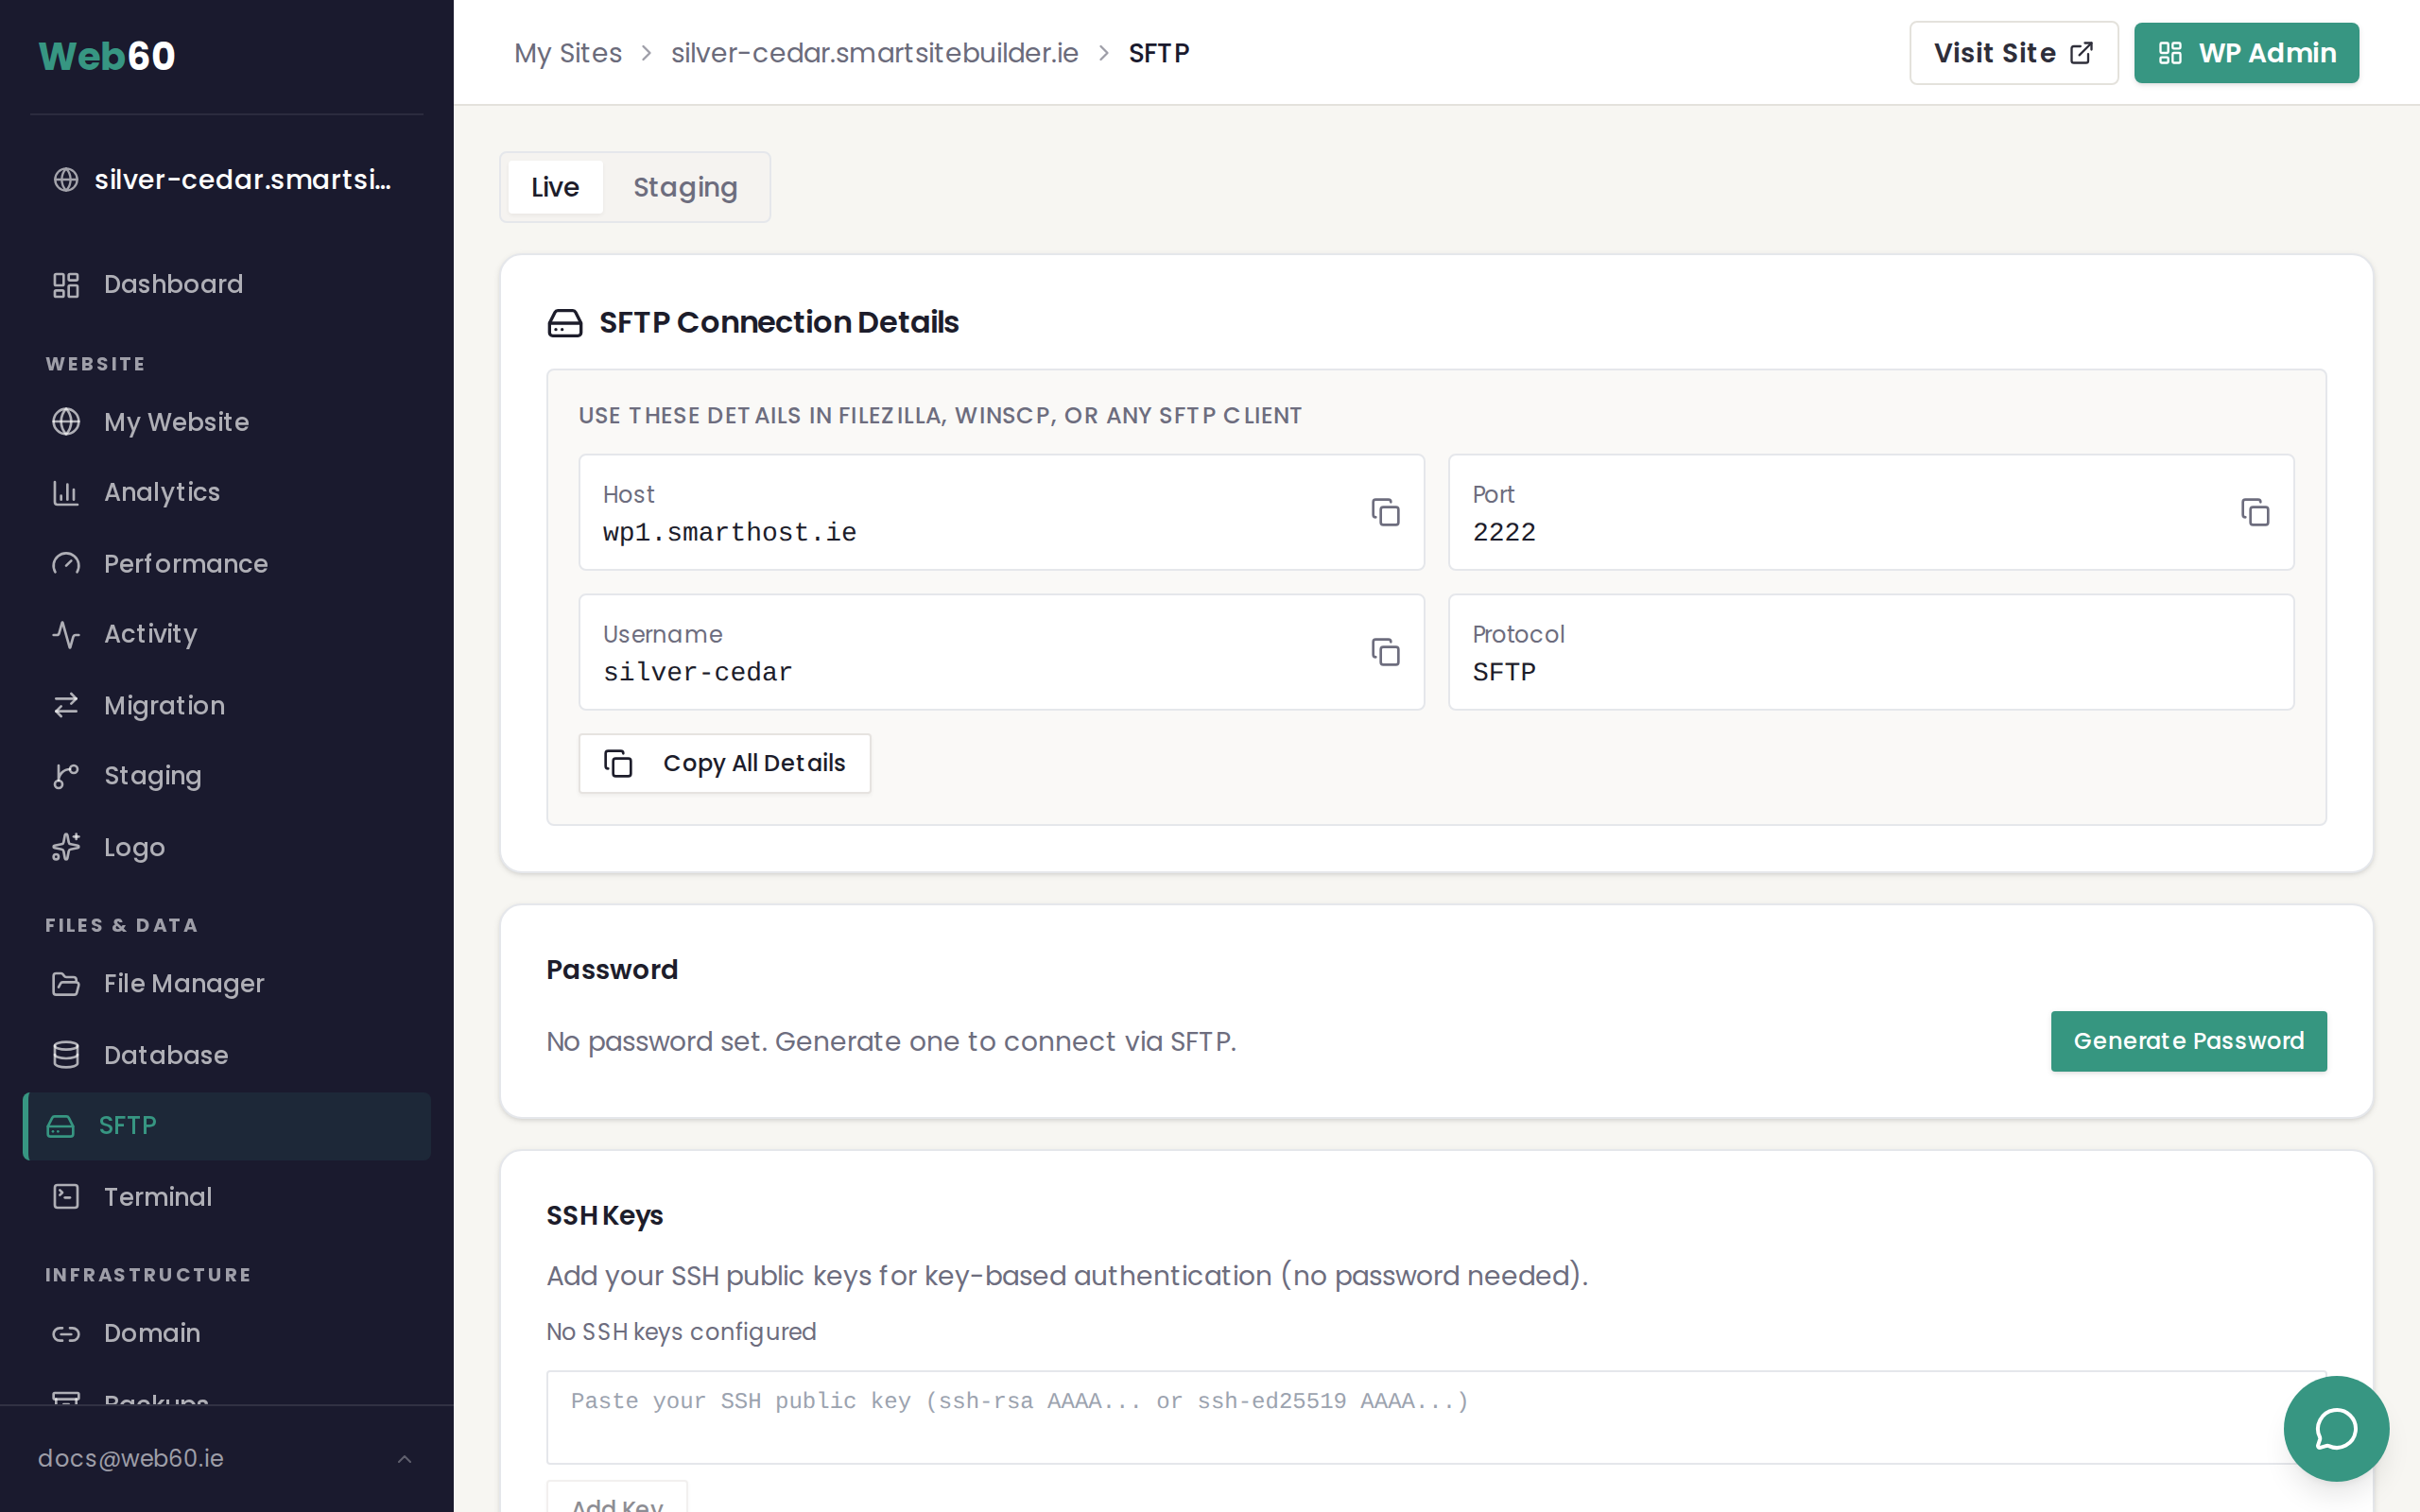
6. View your credentials
Once the activation period is complete, your SFTP connection details are shown on the SFTP page:
- Host — the server address to connect to
- Port — the port number (this may not be the standard default, so make sure to use the number shown)
- Username — your SFTP username for this site
7. Generate your password
Click Generate Password to create your SFTP password. This password is shown once, so copy it and save it somewhere secure straight away. You will need it every time you connect.
If you lose your password, you can generate a new one at any time from this same page.
Your SFTP credentials
Here is a summary of what you will have after completing the steps above:
| Detail | Where to find it |
|---|---|
| Host | SFTP page in your dashboard |
| Port | SFTP page in your dashboard |
| Username | SFTP page in your dashboard |
| Password | Generated by you (save it securely) |
You will enter these four details into your SFTP software (such as FileZilla) to connect to your website files.
Resetting your password
If you ever need a new SFTP password:
- Go to the SFTP section in your Web60 dashboard
- Click Reset Password
- A new password is generated immediately
- Copy and save the new password — the old one stops working straight away
What to do next
Now that SFTP is enabled and you have your credentials, you are ready to connect. See our guide on how to connect using FileZilla for step-by-step instructions on setting up the connection.
Need help?
If you have any trouble enabling SFTP or finding your credentials, visit our support page and we will be happy to help.
Frequently asked questions
Why is there a 24-hour wait before SFTP works?
This is a security measure. The 24-hour activation period gives you time to contact us if someone gains access to your account and tries to enable SFTP without your knowledge. It helps protect your website files from unauthorised access.
Can I change my SFTP password?
Yes. You can generate a new SFTP password at any time from the SFTP page in your Web60 dashboard. Click the Reset Password button and a new password will be created instantly.
Is my SFTP username the same as my dashboard login?
No. Your SFTP username is separate from your Web60 dashboard login. The SFTP username is shown on the SFTP page in your dashboard and is specific to each website.
Last updated: 31 March 2026