
If you already have a WordPress website hosted somewhere else, you can move it to Web60 without any downtime. The migration tool in your Web60 dashboard handles the heavy lifting for you, copying all your pages, posts, images, and settings across automatically.
Before you start
Make sure you have:
- A Web60 account with an active website set up in your dashboard
- Access to your current WordPress website (you will need to log in to install a small plugin)
Your existing website will stay online throughout the entire process. Nothing changes for your visitors until you decide to approve the migration and switch over.
Step 1: Open the Migration tab
- Log in to your Web60 dashboard.
- Select the website you want to migrate into.
- Click Migration in the left-hand sidebar.
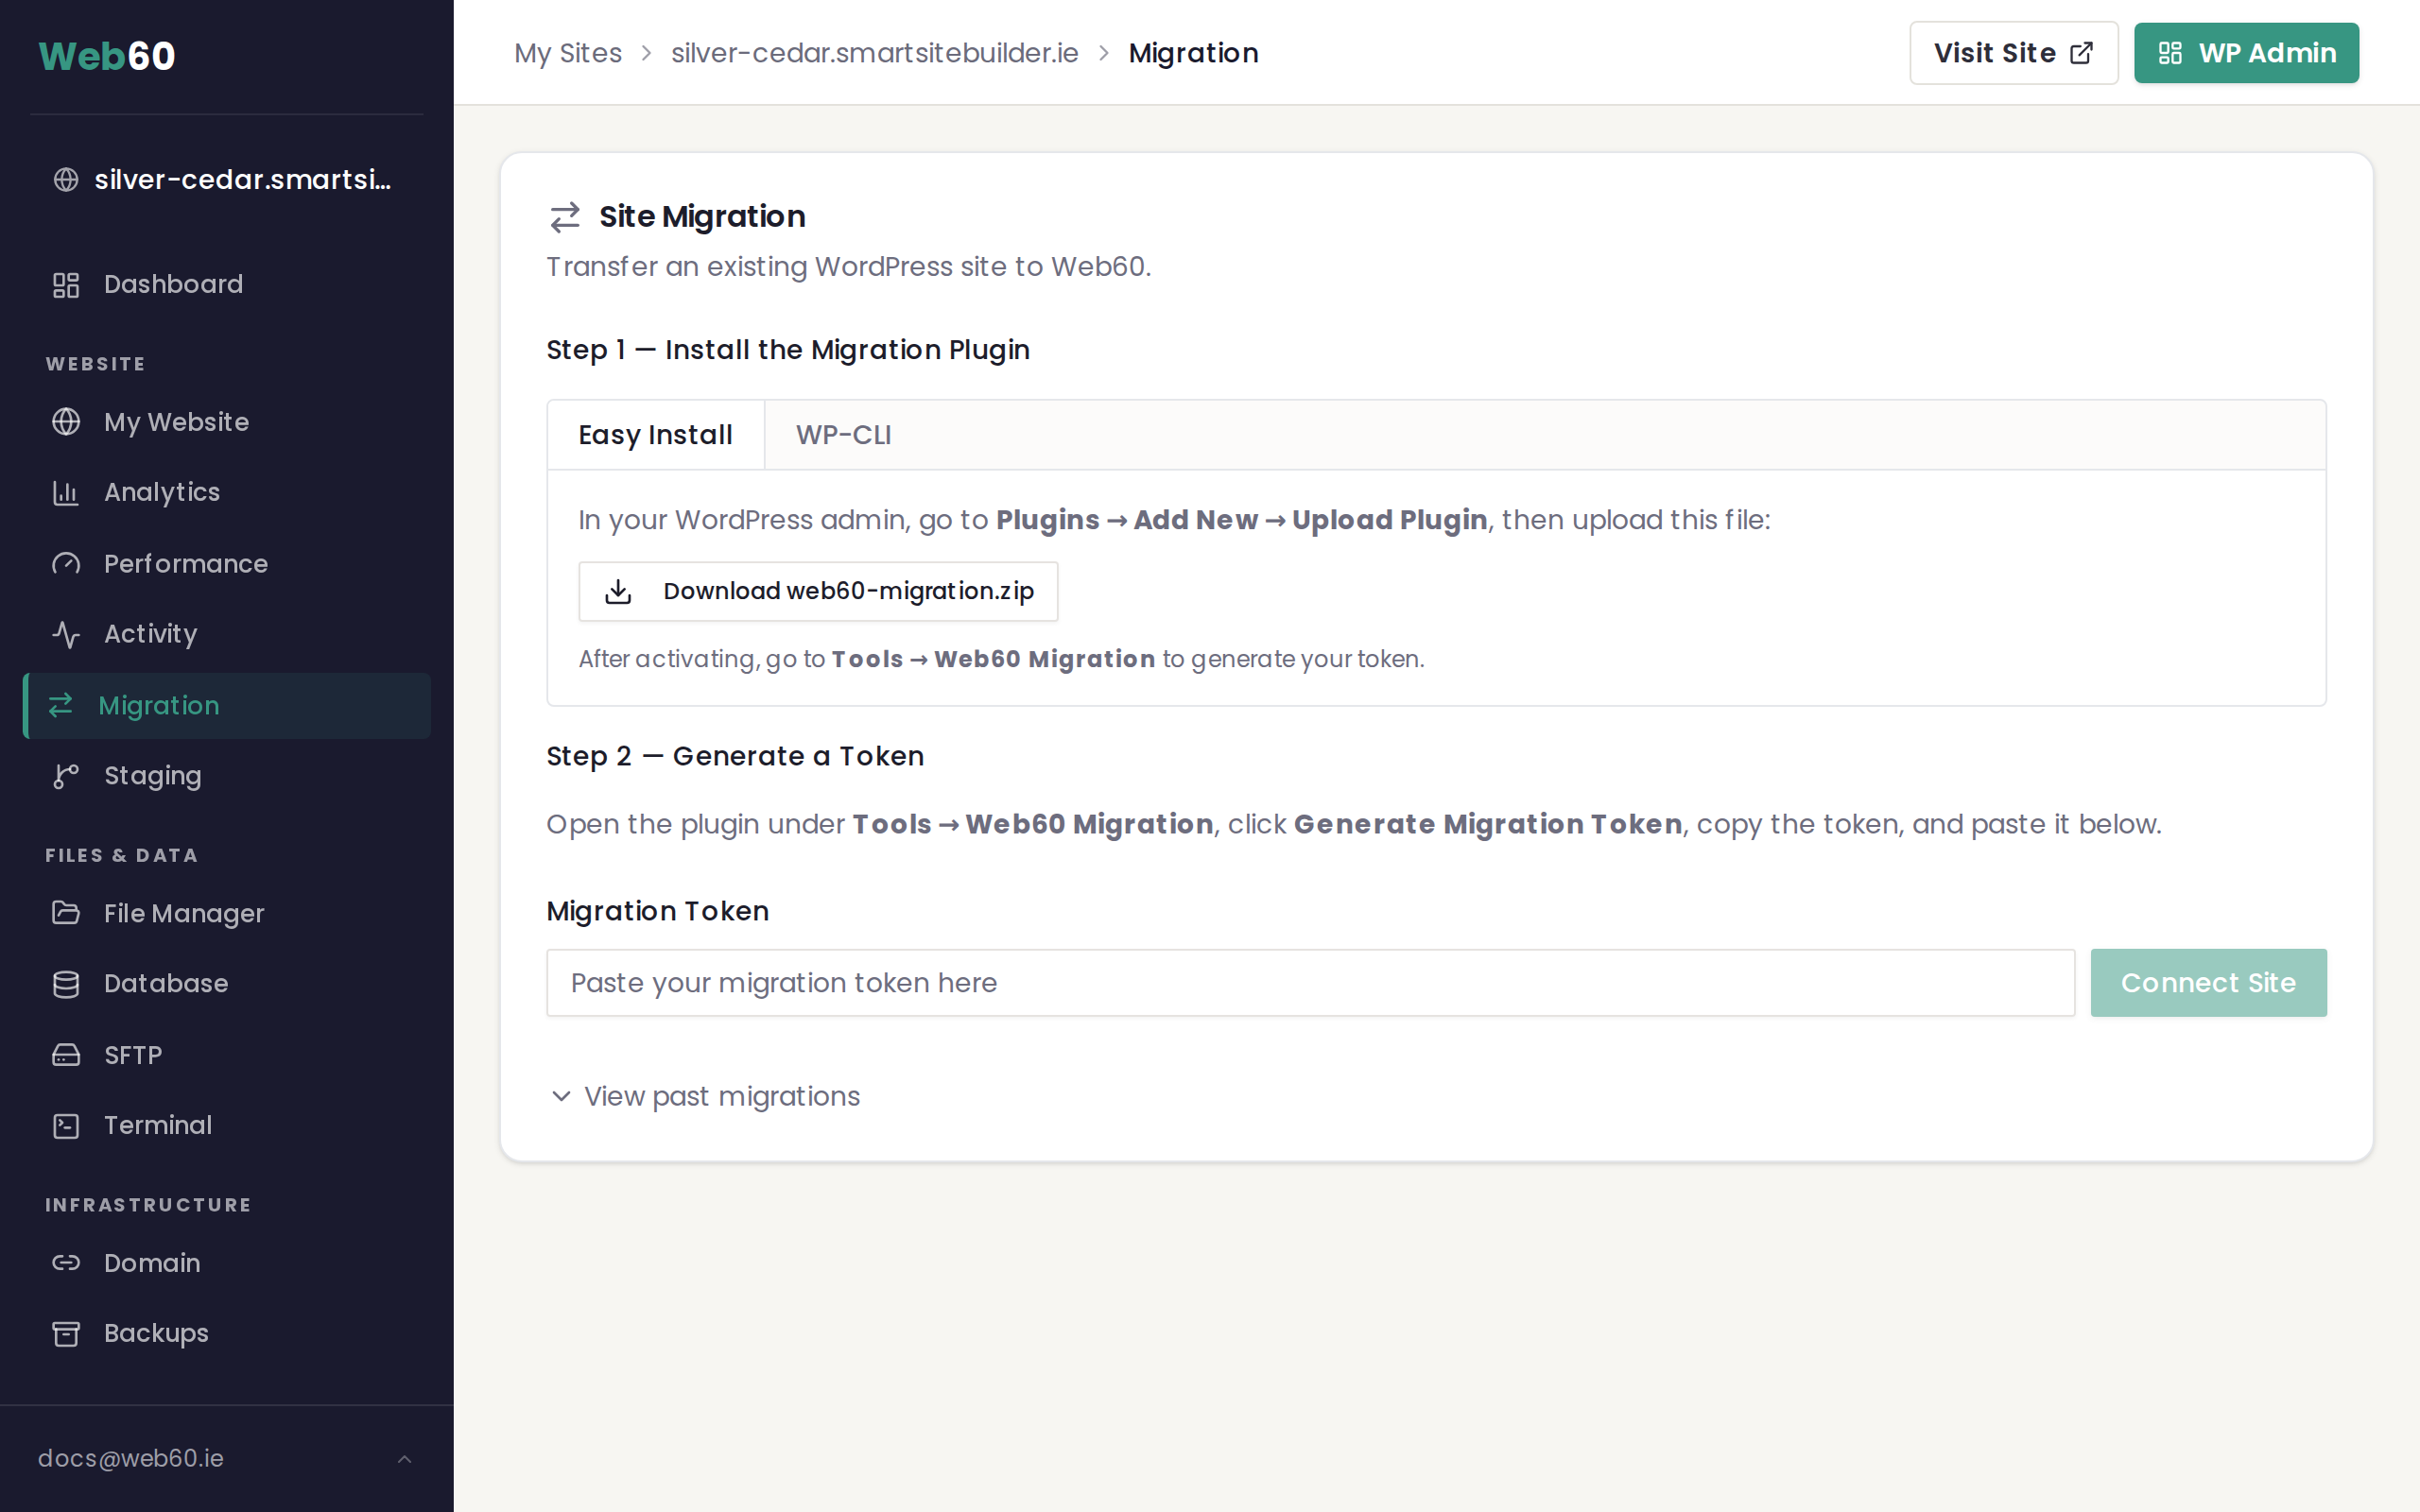
Step 2: Download the migration plugin
On the Migration page, you will see instructions for installing the Web60 migration plugin on your current website.
- Click the Download Plugin button to save the plugin file to your computer.
- Log in to your current WordPress website.
- Go to Plugins, then click Add New, then click Upload Plugin.
- Choose the plugin file you just downloaded and click Install Now.
- Once installed, click Activate.
Step 3: Copy the pairing token
After the plugin is activated on your current site, it will display a pairing token. This is a short code that connects your old site to your new Web60 site.
- Copy the pairing token shown on your current WordPress site.
- Go back to your Web60 dashboard.
- Paste the token into the Pairing Token field on the Migration page.
- Click Confirm to start the migration.

Step 4: Watch the migration progress
Once confirmed, Web60 begins copying your website automatically. You will see the progress update in real time, including:
- Database transfer: your posts, pages, settings, and all other content stored in your database
- File transfer: your images, themes, plugins, and uploads
A progress bar shows how far along the transfer is. You can leave the page and come back at any time because the migration continues in the background.
Step 5: Review on your staging address
When the migration finishes, your website will be available on a temporary staging address. This lets you check that everything looks correct before going live.
- Click the staging link shown on the Migration page to preview your migrated site.
- Browse through your pages, check your images, and make sure everything looks right.
Take your time reviewing. Your old website is still live and nothing has changed for your visitors yet.
Step 6: Approve the migration
Once you are happy that everything looks correct:
- Click the Approve button on the Migration page.
- Your Web60 site will now serve the migrated content.
If anything does not look right after approving, you can use the Rollback button to revert to the previous state.
Step 7: Update your domain
After approving the migration, the final step is pointing your domain name to your new Web60 site. See our guide on connecting your domain for detailed instructions on updating your domain settings.
Cancelling a migration
You can cancel a migration at any point before approving it by clicking Cancel on the Migration page. This removes the in-progress migration without affecting your existing site.
Need help?
If you run into any issues during your migration, visit our support page and we will help you get everything moved across smoothly.
Frequently asked questions
Will my website go offline during the migration?
No. Your existing website stays online throughout the entire process. Visitors will not notice anything until you approve the migration and update your domain settings.
How long does a migration take?
Most migrations complete within a few minutes. Larger websites with many images or a big database may take a little longer, but you can watch the progress in real time from your dashboard.
What if something goes wrong during the migration?
You can cancel the migration at any time before you approve it. If you have already approved and something does not look right, you can roll back to the previous version from your dashboard.
Do I need to install anything on my current website?
Yes. You need to install a small migration plugin on your current WordPress site. The plugin is free and can be downloaded directly from your Web60 dashboard.
Last updated: 15 March 2026