
Creating a staging site gives you a private copy of your website where you can test changes safely. The whole process takes just a few minutes from your Web60 dashboard.
Step-by-step instructions
1. Sign in to your Web60 dashboard
Go to your Web60 dashboard and sign in with your usual email and password.
2. Select your site
Click on the name of the site you want to create a staging copy for.
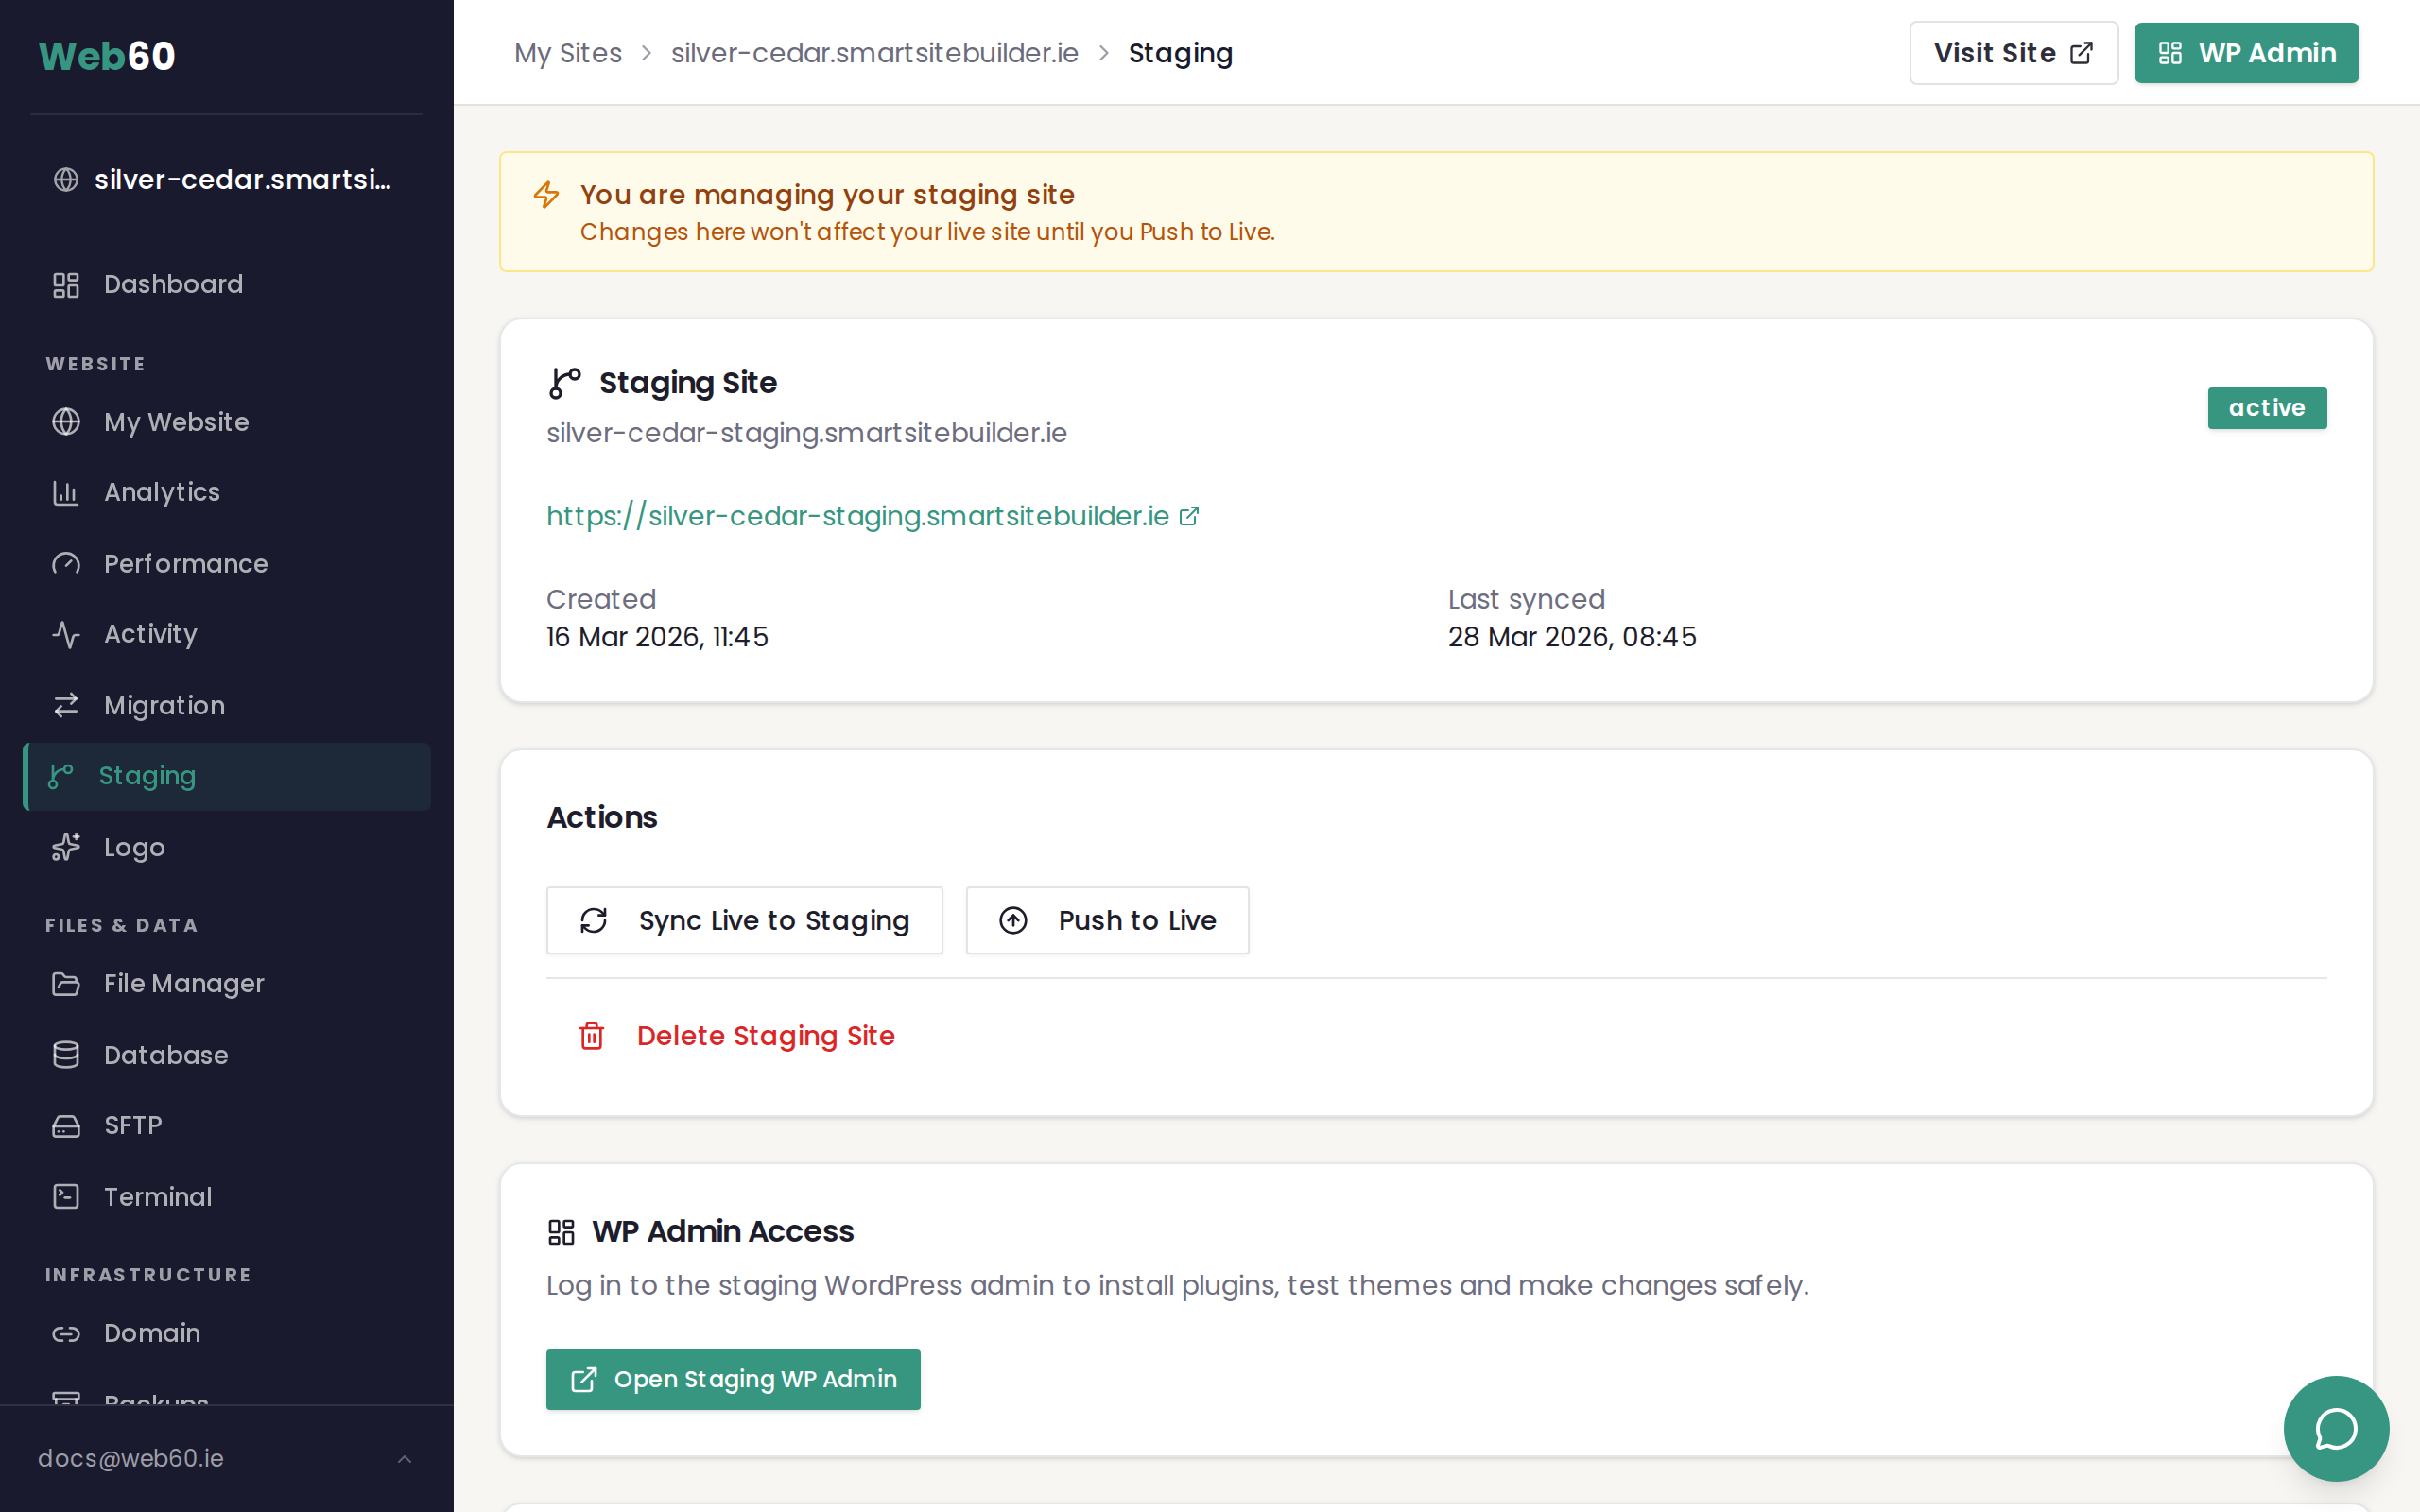
3. Open the Staging section
In the left sidebar, click Staging. This is where you manage your staging site.
4. Click Create Staging Site
Click the Create Staging Site button. Web60 will begin copying your entire website — all your files, pages, posts, images, settings, and database.
5. Wait for the copy to complete
This usually takes two to three minutes, depending on the size of your site. You will see a progress indicator while the copy is being made. Do not close the page while this is happening.
6. Your staging site is ready
Once the copy is complete, your staging site URL and login credentials are displayed on screen. Make a note of these — you will need them to access your staging site.
Accessing your staging site
Your staging site is password-protected to keep it private. To visit it:
- Click the staging URL shown in your Web60 dashboard
- Enter the username and password displayed on the Staging page
- You are now viewing your staging site
This password protection means that search engines and visitors cannot see your staging site. It is completely private.
Editing your staging site
To make changes on your staging site:
- Go to the Staging section in your Web60 dashboard
- Click Open WordPress for the staging site
- You are now in the WordPress dashboard for your staging copy
- Make any changes you want — try new themes, test plugins, edit pages
Everything you do here is completely separate from your live site. Your visitors will not see any of these changes.
What is included in the staging copy
When you create a staging site, Web60 copies everything:
- All your pages, posts, and media files
- Your theme and theme settings
- All installed plugins and their settings
- Your WordPress settings and configuration
- Your entire database
The staging site is an exact copy of your live site at the moment you created it.
Things to know
- Auto-updates are disabled on staging sites. This prevents unexpected changes while you are testing.
- One staging site per live site — you can have one staging site at a time for each of your live websites.
- Staging is free — it is included with your Web60 plan at no extra cost.
Need help?
If you have any questions about creating your staging site, visit our support page and we will be happy to help.
Frequently asked questions
How long does it take to create a staging site?
Usually just a few minutes. Web60 needs to copy all your website files and database, so the time depends on the size of your site. For most sites, it is ready within two to three minutes.
Can I create more than one staging site?
Each live site can have one staging site at a time. If you need a fresh staging copy, you can delete your existing staging site and create a new one, or use the Sync Live to Staging option to refresh it.
Does staging use my backup storage?
No. Your staging site is separate from your backups. Creating a staging site does not affect your backup storage or your backup schedule.
Last updated: 31 March 2026