
Plugin updates are released regularly by their developers to fix problems, improve security, and add new features. Keeping your plugins up to date is one of the most important things you can do to keep your website safe and running smoothly.
Why updates matter
Think of it like updating the apps on your phone. When you ignore updates for too long, things can start to go wrong:
- Security risks. Outdated plugins are the number one way websites get hacked.
- Compatibility issues. Old plugins may stop working properly with newer versions of WordPress.
- Missing features. Updates often include improvements and new capabilities.
Checking for updates in your Web60 dashboard
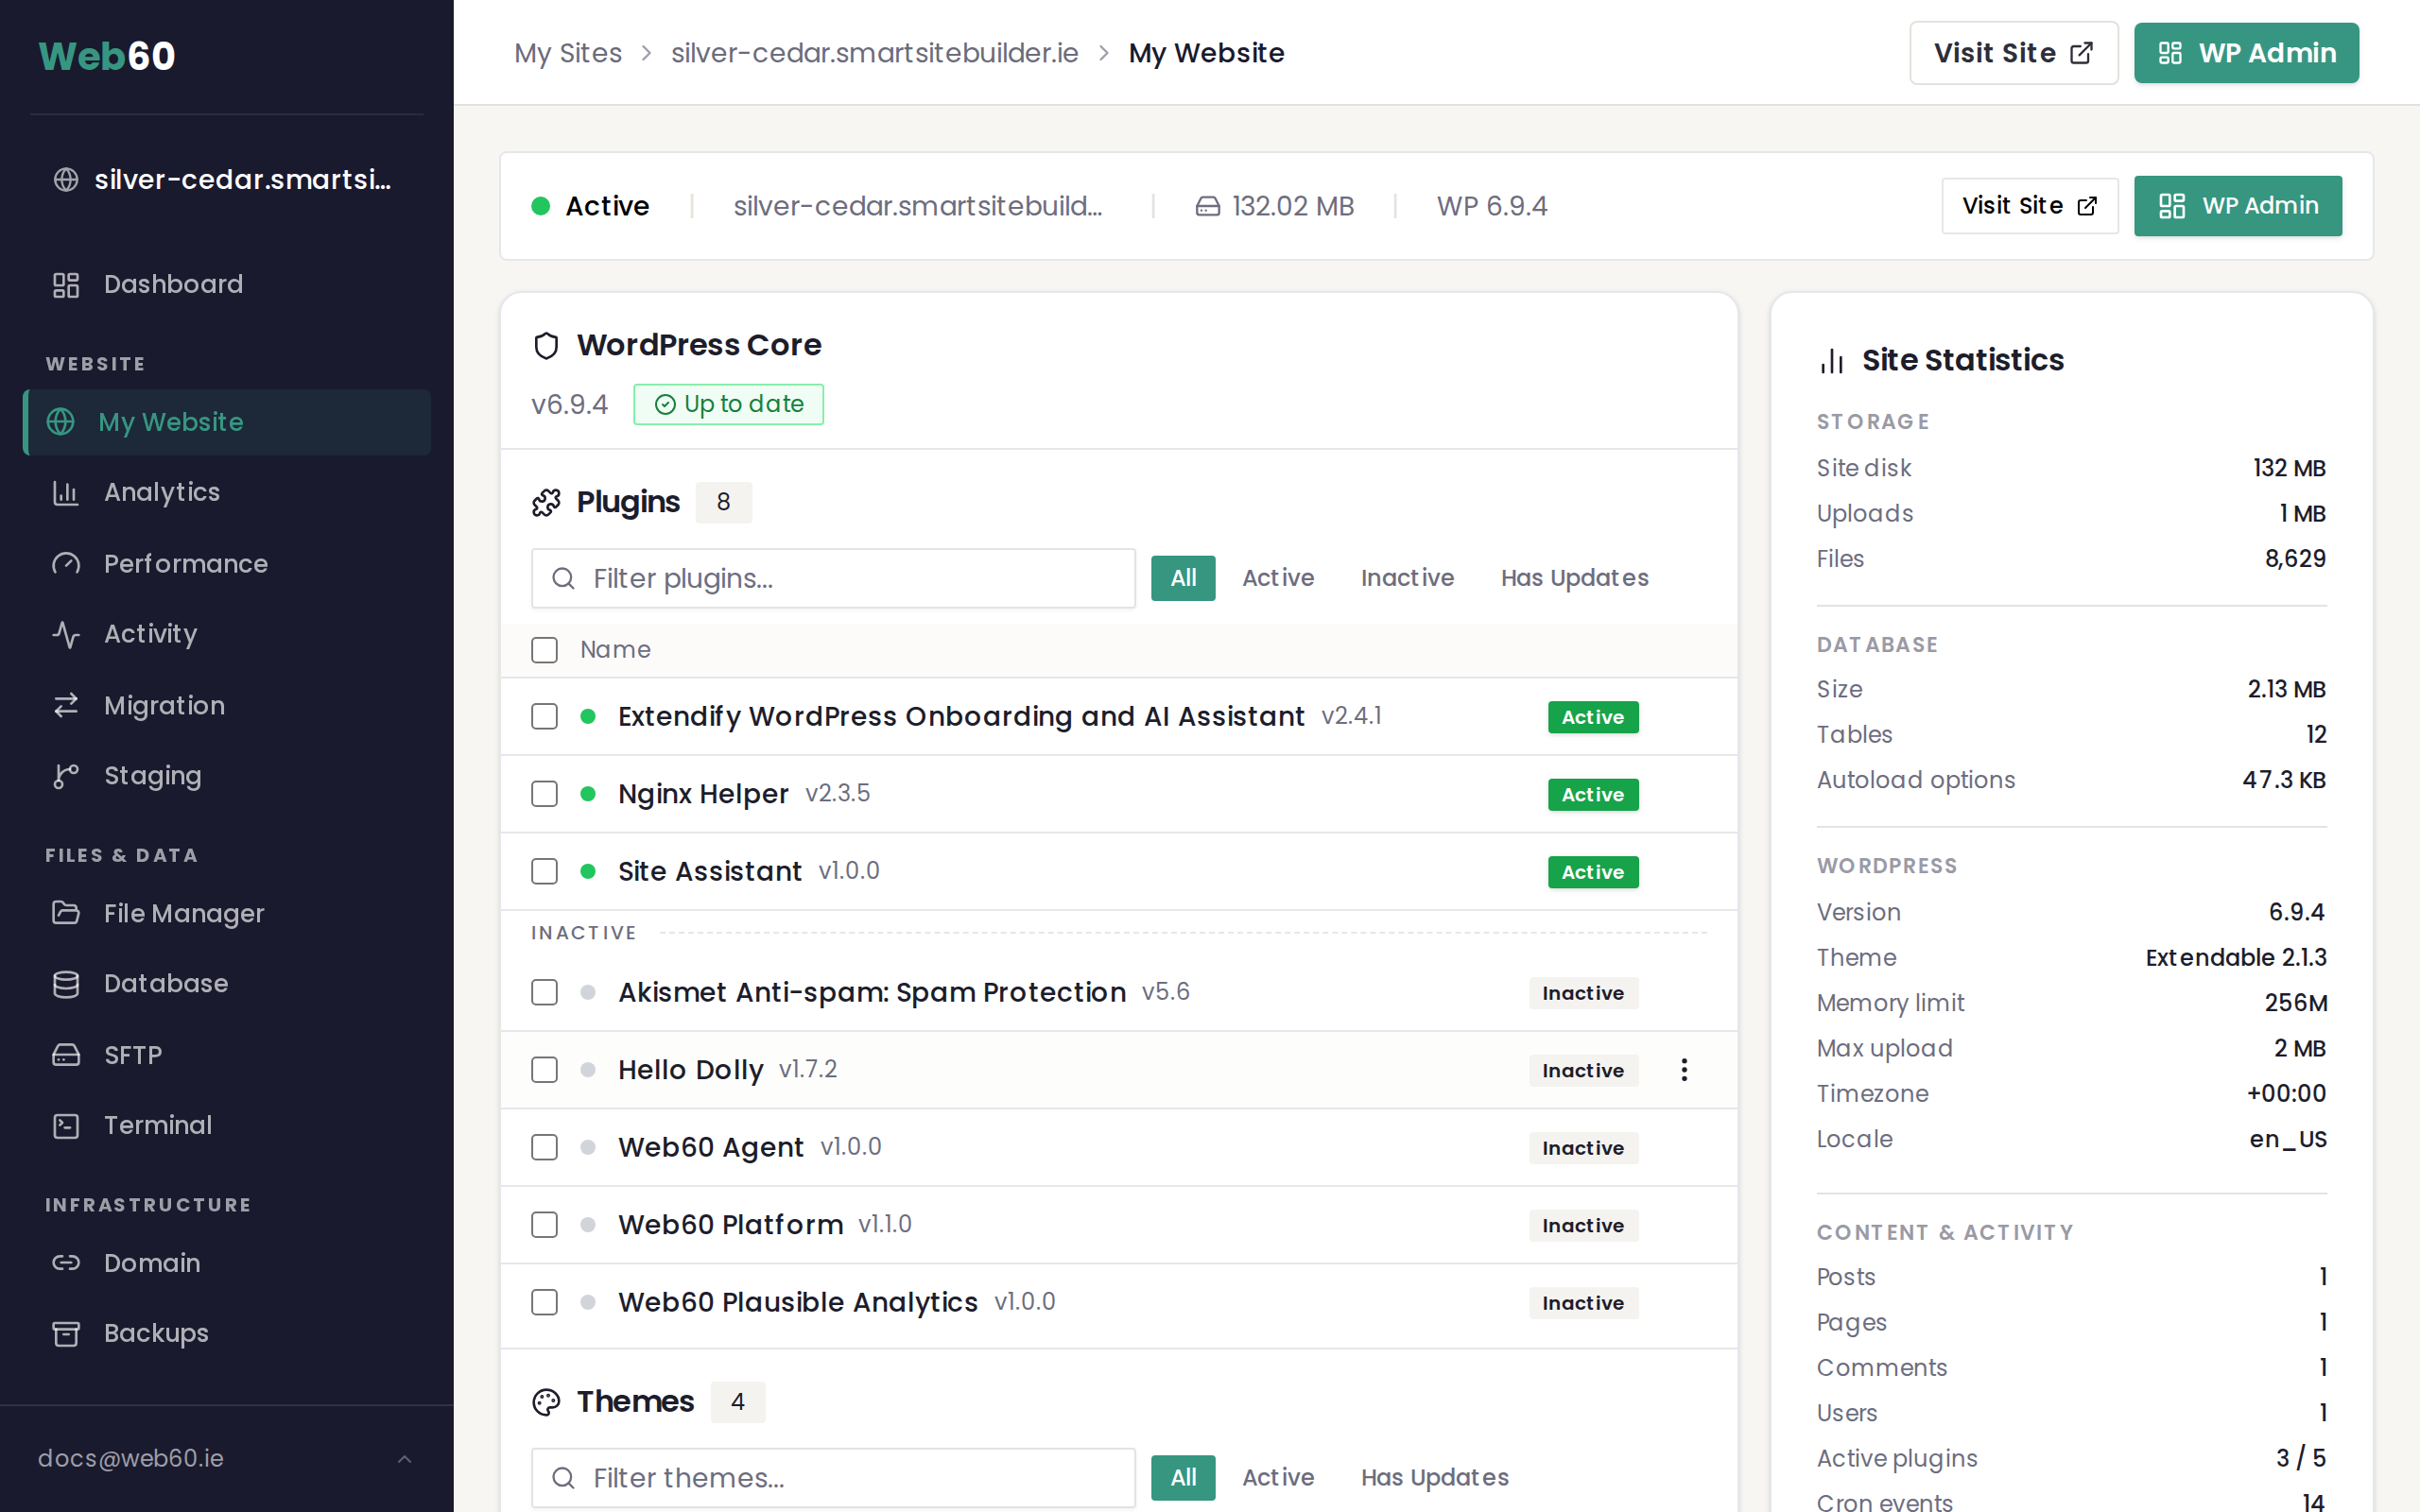
Your Web60 dashboard makes it easy to see which plugins need updating:
- Sign in to your Web60 dashboard at app.web60.ie.
- Click "My Website" in the sidebar.
- The Software Manager section shows all your plugins. Any plugin with an available update will have an "Update" button next to it.
- Click "Update" to install the latest version.
A backup is automatically created before the update runs, so your site is protected.
Setting up automatic updates
If you'd rather not worry about checking for updates yourself, you can turn on automatic updates:
- In your Web60 dashboard, go to "My Website".
- Scroll down to the Auto-Update Settings section.
- Toggle automatic updates on.
- Choose a time for updates to run. We recommend a quiet time like early morning when fewer people are visiting your site.
- Tick "Include themes" if you'd also like your website's design theme to be updated automatically.
- Tick "Create backup before updates". We strongly recommend keeping this turned on.
Once enabled, Web60 will handle everything for you. Updates will be installed at the time you've chosen, and a backup will be taken beforehand just in case.

Checking the activity log
You can see a record of every update that's been made to your website:
- Go to the Updates page in your Web60 dashboard.
- The Activity Log section shows a chronological list of everything that has happened, including updates, backups, and other changes.
- Click "Load more" to see older entries.
This is useful if you notice something has changed on your site and want to check what was updated recently.
Updating from your WordPress editor
You can also check for updates directly in WordPress:
- Open your WordPress editor by clicking "WP Admin" in your dashboard.
- Look for the updates notification in the left-hand sidebar. It shows a number if updates are available.
- Click it to see what needs updating and install updates from there.
Our recommendation
For most business owners, we recommend turning on automatic updates with the backup option enabled. This keeps your site secure without you having to think about it. If an update ever causes a problem, the backup means your site can be restored in minutes.
Need help?
If you're unsure about an update or something doesn't look right after updating, visit our support page and we'll sort it out for you.
Frequently asked questions
Will updating a plugin break my website?
It's uncommon, but it can happen. That's why Web60 automatically creates a backup before running any updates. If something goes wrong, your site can be restored quickly.
What happens if I turn on automatic updates?
Web60 will check for plugin updates and install them at the time you choose. A backup is taken before each update runs, so your site is always protected.
Do I need to update plugins myself?
You can, but you don't have to. Turning on automatic updates in your Web60 dashboard means everything is handled for you.
Last updated: 15 March 2026