
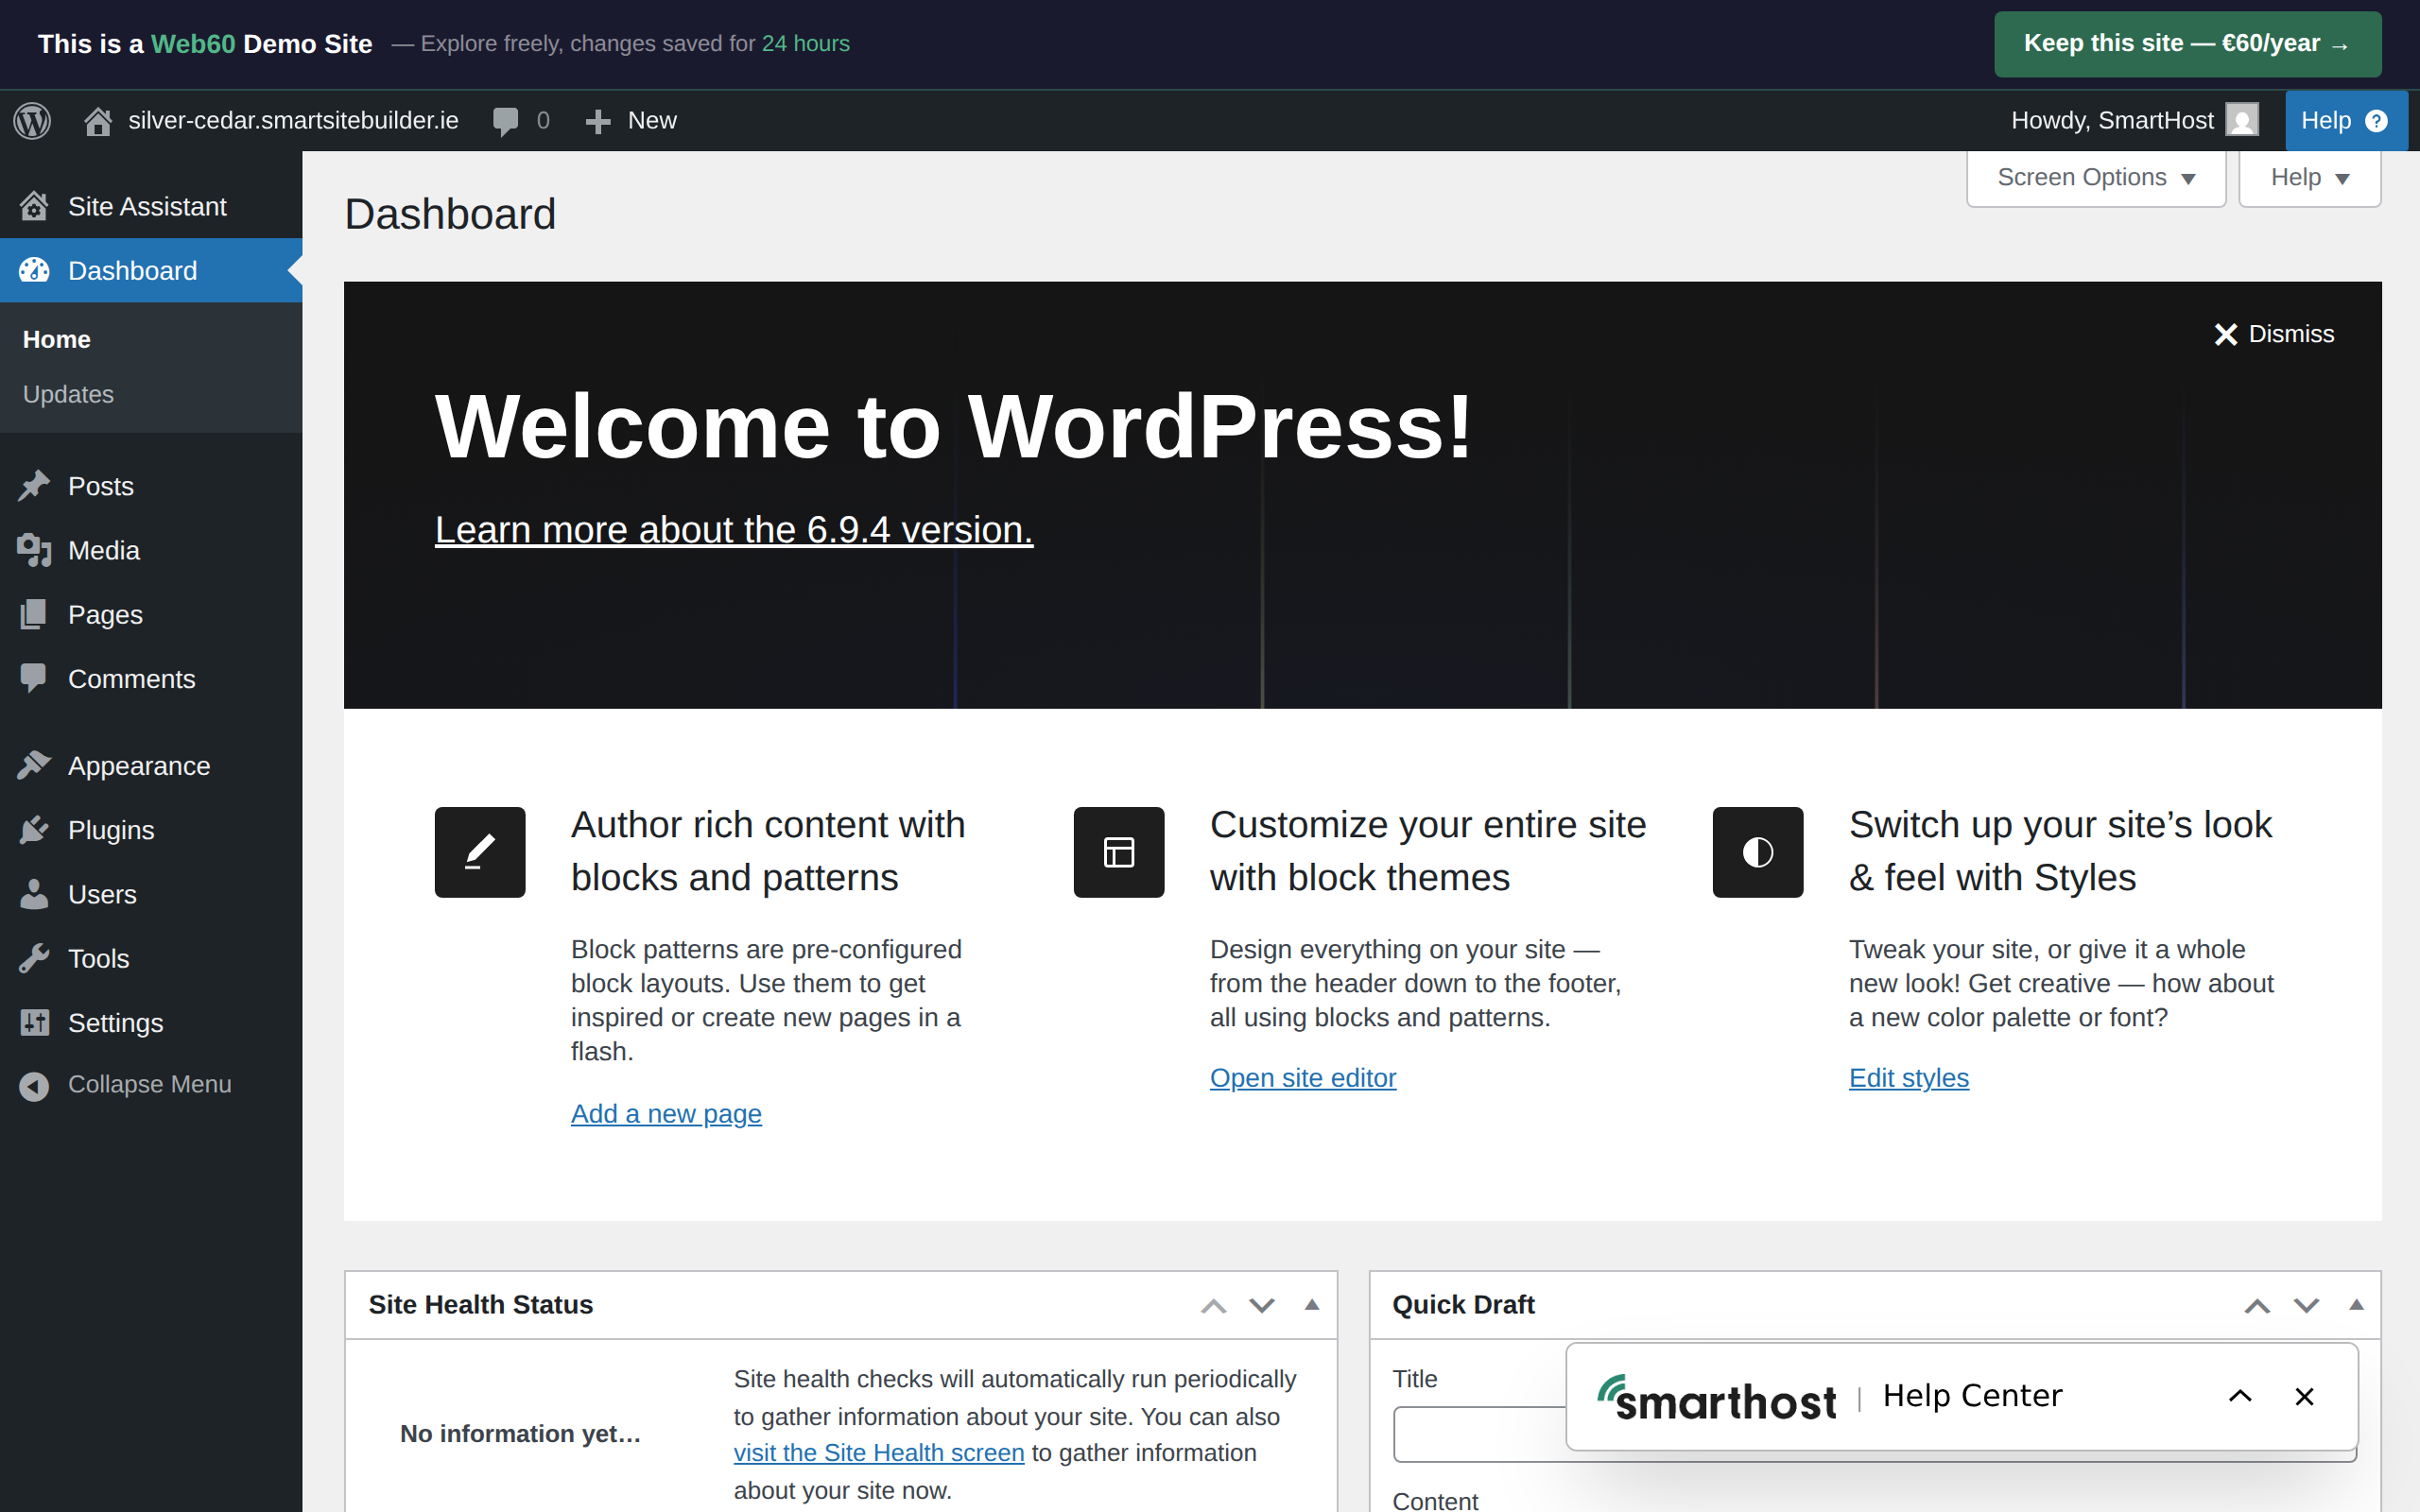
After clicking "WP Admin" from your Web60 dashboard, you'll arrive in your WordPress editor. This is where you manage everything on your website, from writing content to uploading photos. Don't worry if it looks a bit overwhelming at first. This guide will walk you through each section in plain English.
The left-hand sidebar
The most important part of your WordPress editor is the menu running down the left-hand side of the screen. Here's what each item does:
Posts
This is where you write blog articles. If your website has a news section or a blog, you'll create new entries here. Each post has a title, some text, and you can add images too. If you don't plan on blogging, you can ignore this section entirely.
Pages
This is where you'll spend most of your time. Pages are the main parts of your website: your Home page, About page, Contact page, Services page, and so on. Click on any page to edit it, or create a new one.
Media
Think of this as your website's photo album. Every image, document, or file you upload to your website is stored here. You can browse, search, and manage all your files from this section.
Appearance
This section controls how your website looks, including your theme, colours, and menus. The Web60 Site Builder gives you an easier way to handle most of this, so you may not need to visit Appearance very often.
Plugins
Plugins are add-ons that give your website extra features, like contact forms, photo galleries, or online booking. You can see which plugins are installed and turn them on or off from here. We cover plugins in more detail in our guide to installing plugins.
Users
This shows everyone who has access to your WordPress editor. If you need to add a team member so they can help manage your website, this is where you'd do it.
Settings
This section controls things like your site title, tagline, and how your web addresses are structured. In most cases, you won't need to change anything here. Web60 sets everything up for you when your site is created.
The Web60 Site Builder
When you open a page for editing, you'll notice the Web60 Site Builder tools are available. This is a visual block editor that makes it easy to edit professional-looking pages without any technical knowledge. It adds its own toolbar and design options on top of the standard WordPress editor.
You can learn more in our guide to the Web60 Site Builder.
The toolbar at the top
Along the top of the screen, you'll see a dark toolbar. The most useful items here are:
- Your site name lets you click through to visit your live website in a new tab.
- The "+" button lets you quickly add new content when editing a page.
- The "Publish" or "Update" button saves your changes and makes them live.

Tips for getting started
- Start with Pages. This is where most of your work will happen.
- Use the Web60 Site Builder. It's the easiest way to design your pages.
- Don't worry about Settings. Web60 has already configured these for you.
- Upload images through Media, or add them directly when editing a page.
Need help?
If you'd like a hand finding your way around your WordPress editor, visit our support page and we'll walk you through it.
Frequently asked questions
Do I need to understand every menu item in WordPress?
Not at all. Most people only use Pages, Media, and the Web60 Site Builder. You can safely ignore the rest until you need it.
Why does my WordPress editor look different from what I see here?
Plugins can add extra menu items to the sidebar. This is normal, and the core items described here will always be in the same place.
Can I break my website by clicking on something in the WordPress editor?
It's very hard to break anything by browsing the menus. Just be careful with the Settings section and avoid changing anything there unless you're sure.
Last updated: 15 March 2026