
Your Web60 dashboard gives you full control over the plugins and themes installed on your WordPress website. You can view what is installed, activate or deactivate items, run updates, and remove things you no longer need, all without leaving your dashboard.
Where to find the Software Manager
- Log in to your Web60 dashboard.
- Click on your website name to open the My Website page.
- Scroll down to the Software Manager card.
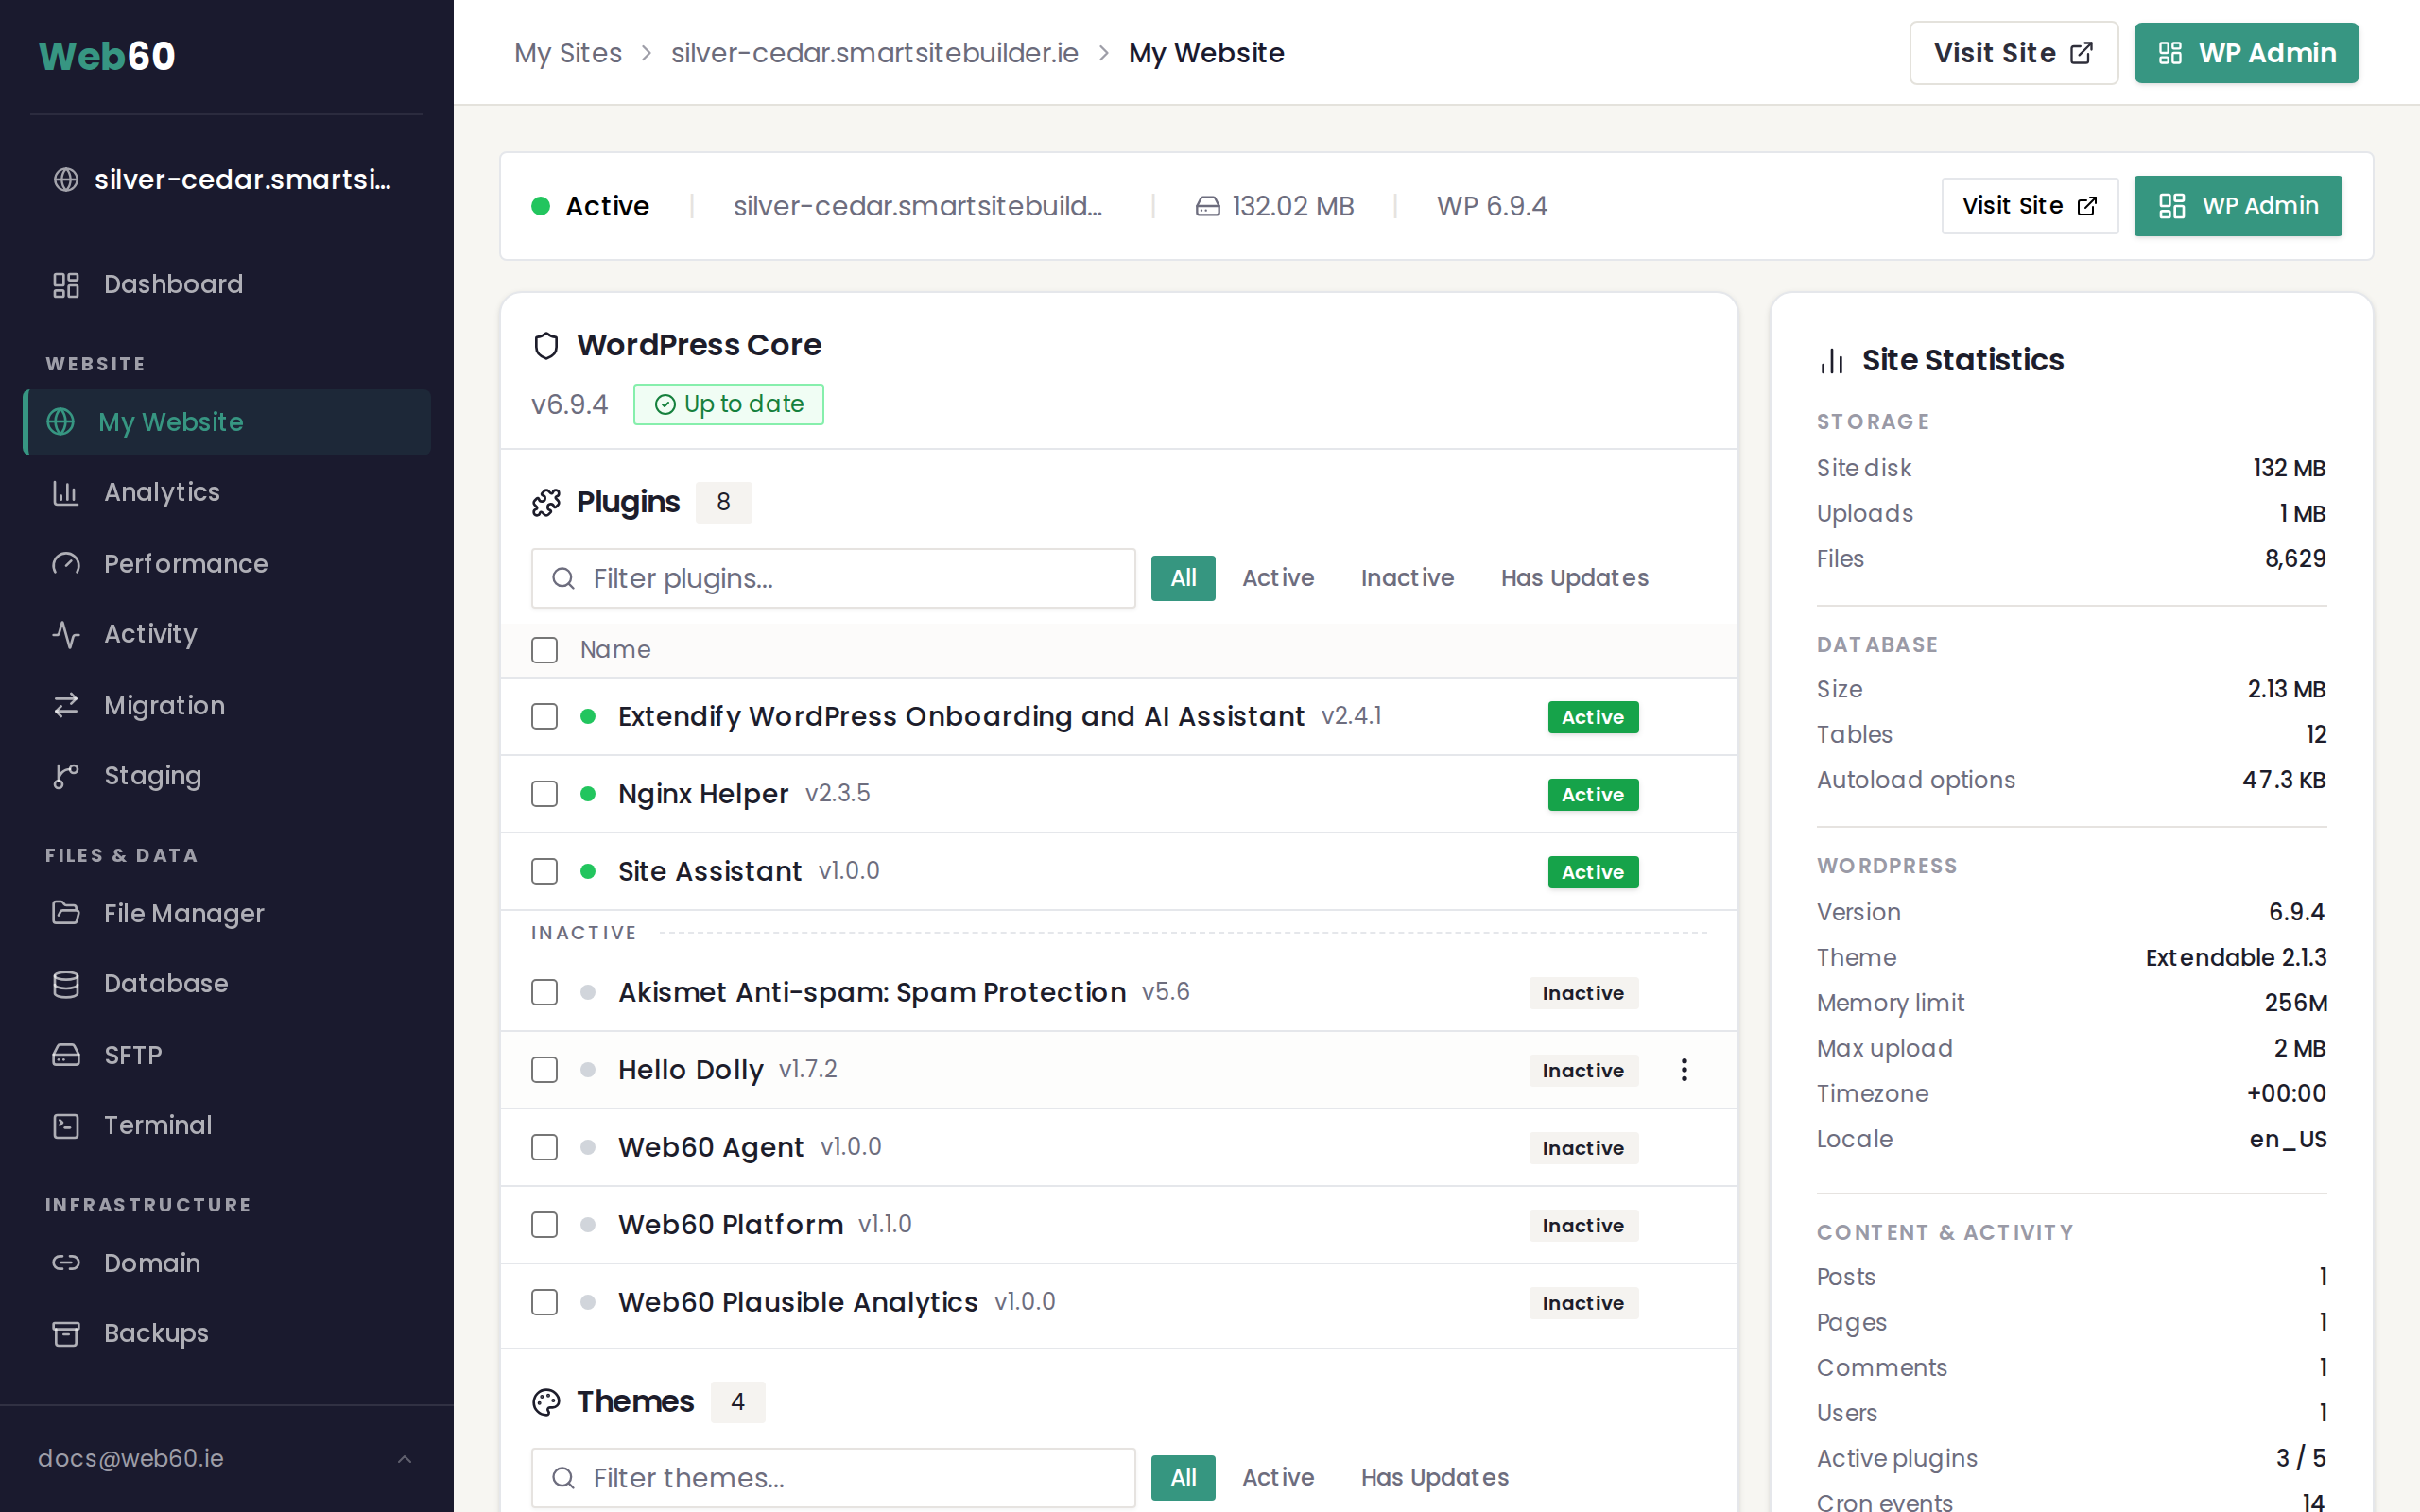
The Software Manager has three tabs: Plugins, Themes, and WordPress Core. Each tab shows you everything that is installed and whether updates are available.

Managing plugins
The Plugins tab lists every plugin on your site. Each plugin shows its name, current version, and status (active or inactive). If an update is available, you will see an update badge next to the version number.
Activate or deactivate a plugin
- Find the plugin you want to change.
- Click the three-dot menu on the right side of that plugin row.
- Choose Activate or Deactivate.
An active plugin is running on your site. A deactivated plugin stays installed but does nothing until you activate it again.
Update a single plugin
- Look for plugins that show an update badge.
- Click the three-dot menu next to the plugin.
- Choose Update.
Web60 takes an automatic backup before the update begins, so your site is protected if anything goes wrong.
Update all plugins at once
- Click the Update All button at the top of the Plugins tab.
- Web60 will update every plugin that has a newer version available.
A backup runs automatically before the bulk update starts.
Filter and search plugins
Use the filter buttons at the top of the tab to view only active plugins, inactive plugins, or plugins with available updates. You can also type in the search box to find a specific plugin by name.
Managing themes
Switch to the Themes tab to see the themes installed on your site. Your active theme is clearly marked.
Activate a theme
- Find the theme you want to use.
- Click the three-dot menu on that theme row.
- Choose Activate.
Your site will immediately switch to that theme.
Update a theme
- Look for themes that show an update badge.
- Click the three-dot menu next to the theme.
- Choose Update.
You can also click Update All at the top to update every theme at once.
Delete an inactive theme
- Make sure the theme is not your active theme. You cannot delete the theme your site is currently using.
- Click the three-dot menu on the inactive theme.
- Choose Delete.
- Confirm the deletion when prompted.
Important: Never delete your active theme. If you want to remove it, first activate a different theme, then delete the old one.
Automatic backups before updates
Every time you update a plugin, theme, or run a bulk update, Web60 automatically creates a backup of your site before making any changes. If an update causes a problem, you can restore your site from that backup. See our guide on restoring a backup for details.
Updating selected plugins only
Sometimes you do not want to update everything at once. The plugin list lets you choose exactly which plugins to update.
- In the Plugins tab, tick the checkbox next to each plugin you want to update.
- A bulk action bar appears at the top showing how many plugins you have selected and an Update (N) button.
- Click Update (N) to update only those plugins. Web60 takes a backup first, then updates them one by one.
Use selective updates when you want to test a specific plugin update before updating the rest. Use Update All when you are happy to bring everything up to date in one go.
Plugin badges explained
Each plugin in the list may show small icons next to its name. Here is what they mean:
- Shield icon means auto-update is enabled for that plugin. It will be updated automatically at the time you have set in your auto-update schedule.
- Lock icon means the plugin is platform-managed and cannot be deleted. You can still deactivate it if needed, but the delete option will not appear.
- Green dot means the plugin is active and running on your site.
- Gray dot means the plugin is inactive. It is still installed but not doing anything.
These badges let you see the state of each plugin at a glance.
Need help?
If you have any questions about managing your plugins or themes, visit our support page and we will be happy to assist.
Frequently asked questions
Can I update all my plugins at once?
Yes. Open the Plugins tab in the Software Manager and click Update All. Web60 will take a backup first and then update every plugin that has a newer version available.
What happens if I delete a theme that my site is using?
You cannot delete the active theme. The delete option only appears on inactive themes. Always switch to a different theme first if you want to remove the one your site is currently using.
Will updating a plugin break my website?
Most updates go smoothly. Web60 automatically takes a backup before any update, so if something does go wrong you can restore your site to the way it was before the update.
Last updated: 15 March 2026